
Delicious Buffalo Chicken Sliders Ready in Just 35 Minutes
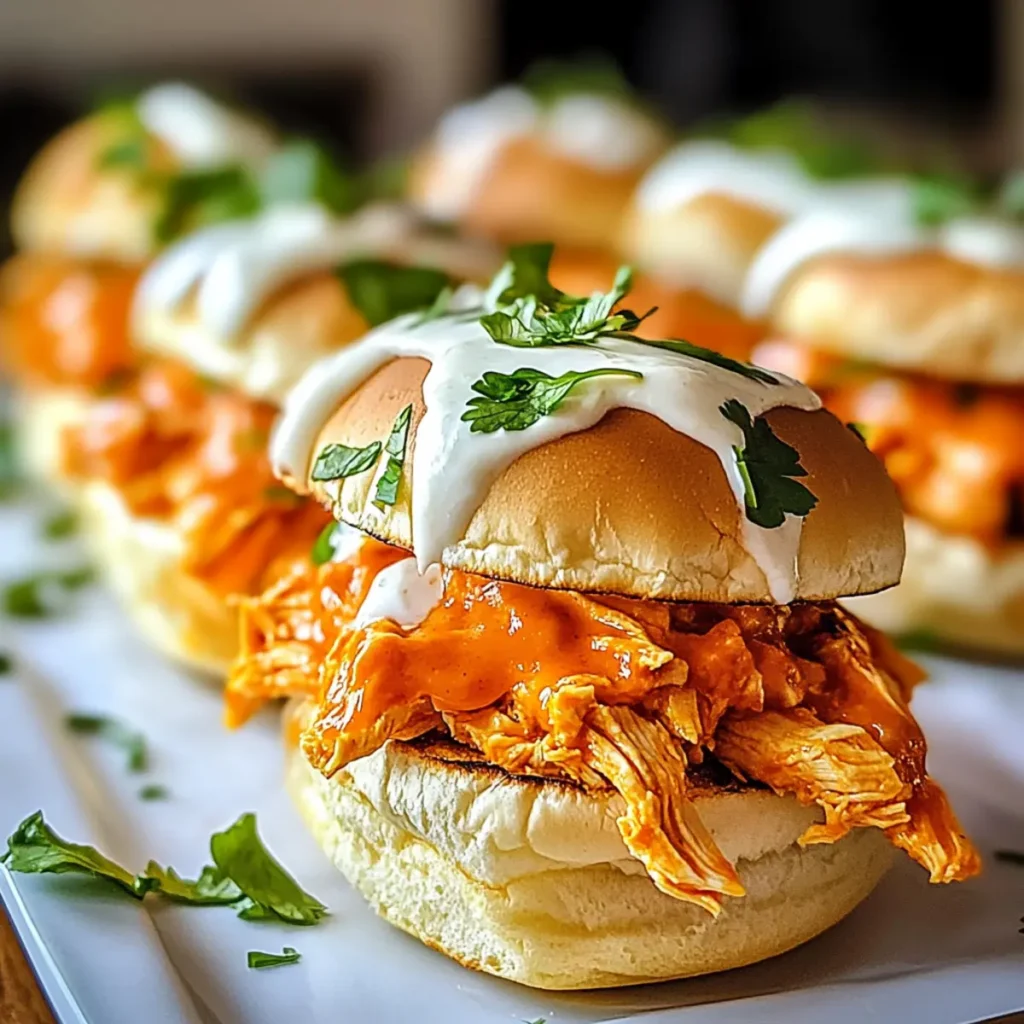
Buffalo Chicken Sliders are the perfect blend of flavor and fun, served hot and ready in just 35 minutes. Imagine bites of tender, shredded chicken coated in spicy buffalo sauce, all tucked into soft, fluffy slider buns. This dish is a fantastic choice for game day, inviting friends over, or even a cozy night in where the couch takes priority over the kitchen. Close your eyes and picture the aroma of garlic mingling with spicy buffalo sauce wafting through your kitchen—mouth-watering, right? These scrumptious Buffalo Chicken Sliders bring back memories of backyard barbecues and lazy afternoons, where the food is hearty and laughter rolls around. So grab that apron, and let’s dive in—your taste buds will thank you later! Ingredients for Buffalo Chicken Sliders Here’s what you’ll need to make this delicious Buffalo Chicken Sliders: 3 boneless, skinless chicken breasts (about 1.5 lbs) – Choose chicken breasts that are fresh or thawed for the best texture and flavor. 1/2 cup buffalo sauce – Regular or extra hot; this is the star of the show, so pick your favorite heat level. 1/4 cup ranch dressing – Adds a creamy balance to the heat. Feel free to use homemade or store-bought. 8 slider buns – Look for soft, fluffy buns; they should be able to cradle the spicy chicken without falling apart. 2 cloves fresh garlic, minced – Fresh garlic gives a robust flavor; don’t skimp on this! Salt and pepper to taste – Fundamental seasonings to enhance the overall flavor of the dish. How to Make Buffalo Chicken Sliders Follow these simple steps to prepare this delicious Buffalo Chicken Sliders: Step 1: Preheat and Prepare Preheat your oven to 400°F (200°C). Grab a greased baking dish and season the chicken breasts with a sprinkle of salt and pepper to taste. Step 2: Bake the Chicken Place the seasoned chicken breasts in your greased dish and let them bake for about 20-25 minutes, or until fully cooked. Once they’re golden and juicy, allow the chicken to cool slightly before shredding. Step 3: Mix the Chicken with Buffalo Sauce While the chicken rests, shred it using two forks or your hands (be careful of the heat!). In a large bowl, combine the shredded chicken with the buffalo sauce, tossing until the chicken is nicely coated. Step 4: Assemble the Sliders Grab your slider buns and place the buffalo chicken on the bottom half of each bun. Drizzle ranch dressing over the chicken for a creamy touch, then top with the other half of the buns. Step 5: Optional Baking Step If you’re feeling extra indulgent, bake the assembled sliders for an additional 5 minutes until the buns are warm and slightly crispy. Step 6: Serve and Enjoy Transfer your sliders to a serving platter, and don’t forget to add some extra ranch on the side. These Buffalo Chicken Sliders are sure to disappear quickly, so maybe make a double batch if you’re entertaining! With the spicy kick from the buffalo sauce and the cool, creamy ranch dressing, these Buffalo Chicken Sliders have a fantastic flavor profile that’s hard to resist. They not only shine as a party appetizer but also make a fun weeknight dinner that can be whipped up in no time. As you dive into this incredibly easy recipe, you’re bound to discover why Buffalo Chicken Sliders are a household favorite. Whether you’re enjoying them with friends or savoring them solo in front of your favorite TV show, these sliders will surely become a staple in your kitchen. So don’t hold back; embrace the flame! Perfecting Buffalo Chicken Sliders Cooking Process Start by preheating your oven and seasoning the chicken. As the chicken cooks, prepare your slider buns and gather all toppings. Shredding the chicken is a breeze right after it cools—this sequence ensures everything comes together seamlessly. Add Your Touch to Buffalo Chicken Sliders Feel free to swap ranch dressing for blue cheese or experiment with different toppings like sliced jalapeños or crispy onions. Adding shredded cheese on top before broiling can also elevate your sliders to the next level. Storing & Reheating Buffalo Chicken Sliders Keep leftovers in an airtight container in the fridge for up to three days. To reheat, simply pop them in the oven at a low temperature until warmed through, preserving their original deliciousness. It’s funny how a simple recipe can become the star of the show at gatherings. I once made Buffalo Chicken Sliders for a casual game night, and they disappeared faster than a cheetah chasing a gazelle. Even my friends, who usually shy away from anything remotely spicy, couldn’t get enough of them. FAQs About Buffalo Chicken Sliders What are Buffalo Chicken Sliders? Buffalo Chicken Sliders are miniature sandwiches filled with tender, shredded chicken that’s been mixed with tangy buffalo sauce. These delightful bite-sized treats are typically served on slider buns and can be topped with ranch dressing for a creamy contrast. Perfect for parties, snacks, or casual dinners, these sliders pack a punch of flavor while being easy to prepare. They’re a fun twist on classic buffalo wings, making them a crowd-pleaser at any event. How can I customize Buffalo Chicken Sliders? Getting creative with Buffalo Chicken Sliders is a breeze! You might swap ranch dressing for blue cheese for a classic pairing. For an extra kick, consider adding sliced jalapeños or crispy onions on top. If you love cheese, sprinkle some shredded cheddar or Monterey Jack on the chicken before baking. Another delicious idea is to mix in some sautéed bell peppers for added color and flavor. The possibilities are endless! Can I make Buffalo Chicken Sliders in advance? Yes, you can absolutely make Buffalo Chicken Sliders in advance! Preparing them a day ahead is a great way to save time. Simply cook the chicken, mix it with buffalo sauce, and store it in an airtight container in the refrigerator. When you’re ready to serve, just warm it up and assemble the sliders on fresh buns. This makes them
Creamy Avocado Crema Recipe: Quick and Refreshing Dip
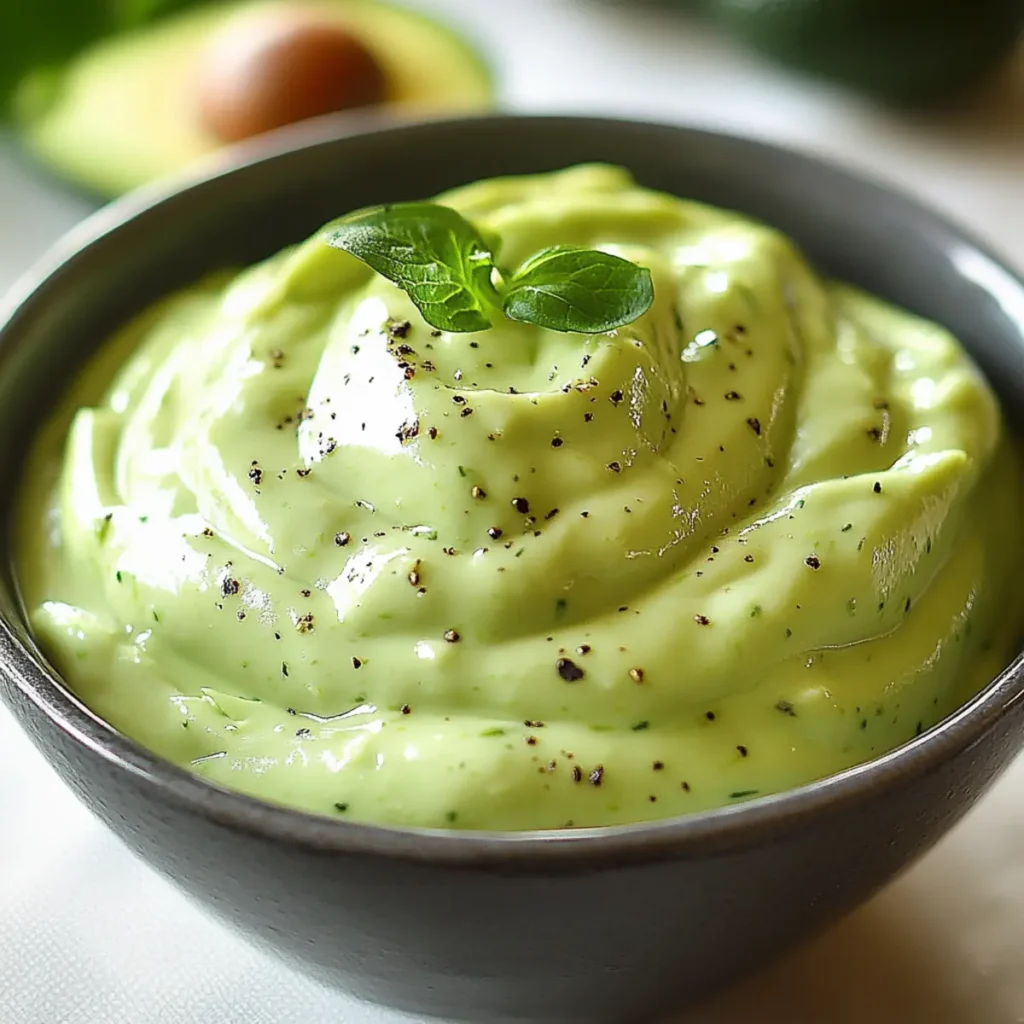
There’s something irresistibly creamy and dreamy about Avocado Crema that simply captures the heart and tantalizes the taste buds. A dollop of this luscious dip brings vibrancy to any plate, whether it’s swirled atop tacos, dolloped on grilled chicken, or simply enjoyed with crunchy tortilla chips. Imagine the smooth, buttery green goodness melting in your mouth while a zesty kick from lime and a hint of garlic dance around, creating a fiesta of flavors that makes even your taste buds do the cha-cha. Back in college, I remember the first time I attempted to impress my friends with a homemade dip at our taco night. Little did I know that a simple blend of avocados, lime, and a bit of sour cream would transition me from ‘college kid’ to ‘culinary wizard’ in one swift, creamy motion. Now, whenever I whip up this Avocado Crema, it takes me back to those fun nights filled with laughter, too many taco toppings, and the occasional spontaneous dance-off in the kitchen. Serve this treasure at your next gathering, and I promise you’ll leave everyone clamoring for the recipe. Ingredients for Avocado Crema Here’s what you’ll need to make this delicious Avocado Crema: 2 ripe avocados – Always choose avocados that yield slightly to pressure for the perfect creaminess. A little bruising never hurt but avoid overly mushy ones. 2 tablespoons fresh lime juice – Freshly squeezed is best for that bright acidity to balance the richness of the avocados. 1 garlic clove – Finely minced to enhance the flavor without overpowering the dip. Fresh garlic packs a punch! ¼ cup fresh cilantro (optional) – Perfect for those who love an herby, fresh kick. Feel free to leave it out if you’re not a fan of cilantro! ½ cup sour cream or Greek yogurt – Either adds creaminess and tang, but Greek yogurt is a lighter option without sacrificing taste. Salt and pepper to taste – Essential for bringing all the flavors together in perfect harmony. How to Make Avocado Crema Follow these simple steps to prepare this delicious Avocado Crema: Step 1: Prepare your ingredients Begin by chopping the avocados and mincing the garlic. This will help your blender work its magic more easily. Step 2: Blend the ingredients In a blender or food processor, add the chopped avocados, lime juice, minced garlic, cilantro (if using), and sour cream or Greek yogurt. Season generously with salt and pepper. Step 3: Create a smooth mixture Blend everything together until you achieve a smooth and creamy consistency. If it’s too thick, you can add a teaspoon of water or more lime juice until you’re satisfied. Step 4: Taste and adjust Give your Avocado Crema a taste. Is it tangy enough? Does it need a bit more salt? Adjust as necessary to suit your palate, because let’s be honest—this cook’s opinion is the only one that really matters at this stage. Step 5: Chill before serving (optional) For the best flavor, chill your Avocado Crema in the refrigerator for about 30 minutes. This also allows the flavors to meld deliciously together! Step 6: Dive in and enjoy Transfer your stunning Avocado Crema to a bowl and serve it with chips, tacos, grilled meats, or even fresh veggies for dipping. Everyone will be asking for seconds! With its creamy texture and harmonious flavors, this Avocado Crema is sure to steal the show at your next gathering. You’ll find that not only is it easy to prepare, but it also brightens up your dishes in the most magical way. Enjoy making it and sharing it, or just keep it all to yourself—I’m not here to judge! Perfecting Avocado Crema Cooking Process Begin by preparing your ingredients, chopping the avocados and garlic to ensure a smooth blend. Next, combine all ingredients in a blender or food processor before serving for a creamy, velvety texture that hits the spot. Add Your Touch to Avocado Crema Feel free to customize your Avocado Crema! Swap sour cream for Greek yogurt for a tangy twist, or add jalapeños for a spicy kick. Fresh herbs or diced tomatoes can also add a refreshing touch. Storing & Reheating Avocado Crema Store any leftover Avocado Crema in an airtight container to keep it fresh. To prevent browning, press plastic wrap directly onto the surface. This dip tastes best chilled, so no reheating is necessary. For my best friend’s birthday, I whipped up this Avocado Crema and it was gone within minutes. Everyone kept asking for the recipe, and I felt like a rockstar chef in my own kitchen! FAQs About Avocado Crema What is Avocado Crema? Avocado Crema is a creamy, flavorful dip that elevates any meal with its vibrant taste and smooth texture. This dish is made with ripe avocados, lime juice, garlic, and a choice between sour cream or Greek yogurt. The optional addition of cilantro brings freshness, making it a perfect accompaniment for tacos, grilled meats, or even as a spread on sandwiches. It’s quick to whip up and brings a little taste of the southwest right into your kitchen, impressing guests and family alike. How do I make Avocado Crema? Making Avocado Crema is both simple and quick. Start by chopping your ripe avocados and a garlic clove. Then, blend these with lime juice, your choice of sour cream or Greek yogurt, and season with salt and pepper to taste. Optionally, you can add cilantro to enhance the flavor. Blend until you achieve a smooth consistency, and voilà! You have a delicious dip ready to be enjoyed within minutes. Can I customize my Avocado Crema? Absolutely! Avocado Crema is incredibly versatile. If you like it tangy, consider swapping sour cream for Greek yogurt. For those who enjoy a bit of heat, adding jalapeños or a dash of hot sauce will kick things up a notch. To enhance freshness, throw in some fresh herbs or diced tomatoes. Experiment with flavors to make it uniquely yours! How should I store Avocado Crema? To store
Delicious Fried Pickle Dip Recipe Perfect for Parties and Snacking
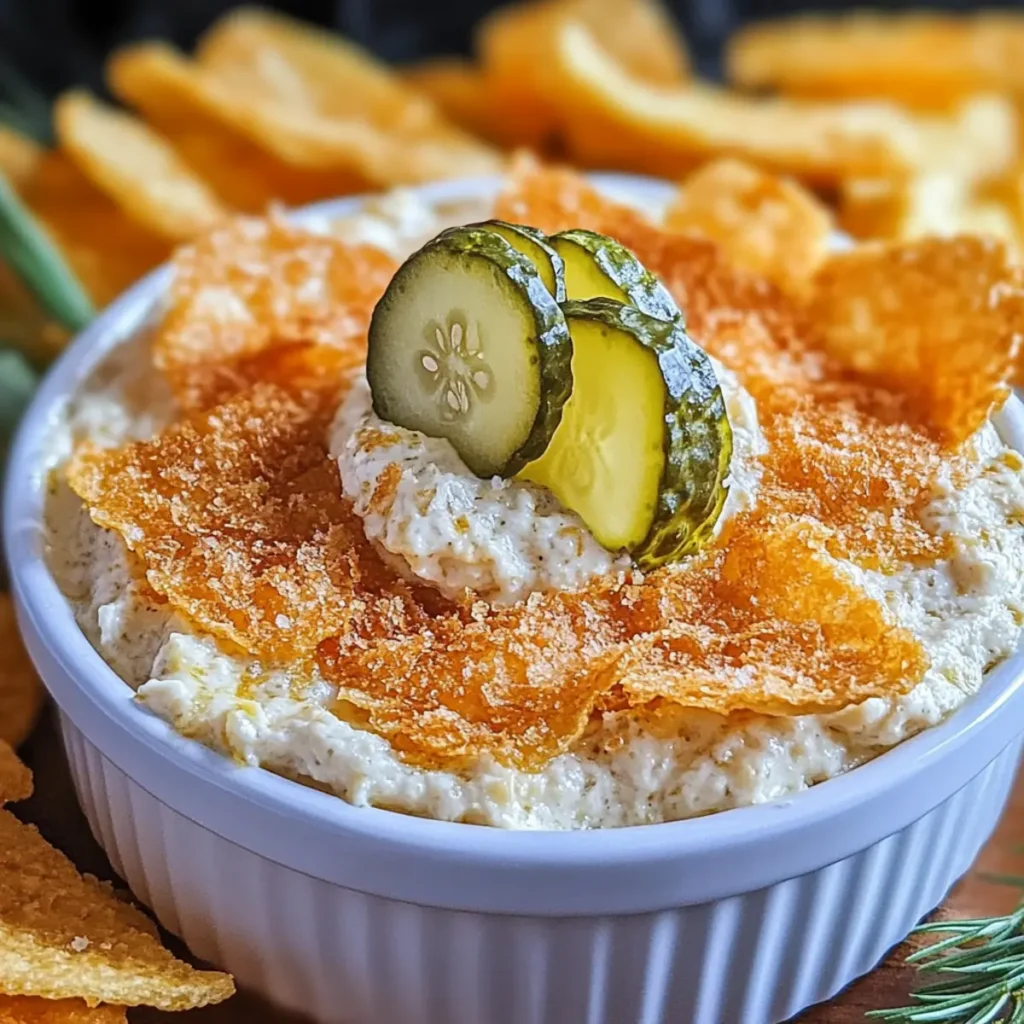
The delightful aroma of crispy fried pickles blends seamlessly with the creamy goodness in this Fried Pickle Dip. It’s like you’ve taken all the joy of a summer picnic and gathered it into a single, irresistible dish that’s perfect for any occasion. Imagine hosting friends or family over and watching their eyes light up as you unveil this tasty dip that begs to be devoured. Imagine this scenario: It’s a cozy evening, game day, or even a potluck—whatever the occasion, Fried Pickle Dip is there to save the day. This dip packs a bold flavor punch that will keep you going back for more. Trust me, your taste buds will be singing your praises in no time! Ingredients for Fried Pickle Dip Here’s what you’ll need to make this delicious Fried Pickle Dip: 0.5 cup Panko bread crumbs – These provide a delightful crunch that complements the creamy dip perfectly. 1 tablespoon butter – Used for toasting the breadcrumbs to golden perfection, enhancing the flavor. 2 cups sour cream – Adds a creamy base that balances out the zesty flavors of the pickles. 4 oz cream cheese – Soften it beforehand for easier mixing and a rich texture that makes the dip irresistible. 1 packet ranch seasoning – Adds a delicious herby flavor that transforms the dip into a taste sensation. 1 tablespoon lemon juice – A bright note that lifts the entire flavor profile and adds zing. 3 tablespoons dill pickle juice – Essential for that punchy pickle flavor that is the star of this dip. 1.5 cups dill pickles – Chopped finely to distribute their crunch and tartness throughout the dip. 2 cloves garlic – Crushed for a fragrant kick, elevating the dip to another level of yum. 1 tablespoon fresh chives – Minced to bring a fresh, mild onion flavor that compliments the dip. 1 tablespoon fresh dill – Adds a garden-fresh flavor that harmonizes beautifully with the pickles. salt and pepper – Season to taste, because no dip is complete without proper seasoning. hot sauce (optional) – For those brave souls who love to add a little heat to their life. How to Make Fried Pickle Dip Follow these simple steps to prepare this delicious Fried Pickle Dip: Step 1: Toast the Breadcrumbs Melt 1 tablespoon of butter in a frying pan over medium-high heat. Add the Panko bread crumbs, stirring frequently for about 2-3 minutes until they turn crisp and golden brown. Once toasted, remove from heat and pour into a small bowl to cool. Step 2: Prepare the Base In a mixing bowl, combine the sour cream, softened cream cheese, ranch seasoning, dill pickle juice, lemon juice, and if you like a bit of heat, a few drops of hot sauce. Use an electric hand mixer to blend until everything is smooth and well combined, making sure you’re dancing a little while you do it. Step 3: Add the Good Stuff To the creamy mixture, fold in the chopped pickles, crushed garlic, minced dill, and chives. Stir gently until just combined. Now, taste it – and feel free to add any salt, pepper, or extra hot sauce to match your taste buds’ fancy. Step 4: Layer to Perfection Spoon about half of the mixture into your chosen serving dish. Sprinkle half of the toasted breadcrumbs on top, then layer in the rest of the dip and finish off with the remaining breadcrumbs. This two-layer approach is sure to wow your guests! Step 5: Serve and Enjoy Pair it with your favorite dippables—potato chips, pita chips, or delightful fresh veggies. Whatever you choose, enjoy every gooey, zesty bite of your Fried Pickle Dip goodness! So, are you ready to become the star chef of your next gathering? This Fried Pickle Dip is your secret weapon to transforming any ordinary gathering into an extraordinary feast! This showstopping Fried Pickle Dip delivers restaurant-quality results using simple ingredients you probably already have at home. The perfect balance of textures and flavors creates an unforgettable dining experience that will have everyone asking for seconds. Picture-perfect presentation with vibrant colors makes this dish absolutely Instagram-worthy and guaranteed to impress any dinner guest. Incredibly versatile recipe that works beautifully for weeknight dinners, meal prep, special occasions, or even outdoor entertaining sessions. Perfecting Fried Pickle Dip Cooking Process Start by toasting your Panko bread crumbs first; this enhances their crunch and flavor. While they cool, mix the creamy ingredients, ensuring everything is blended smoothly. Finally, layer your dip with that crispy topping to maintain its delightful texture. Add Your Touch to Fried Pickle Dip Get creative with this dip! Try swapping in Greek yogurt for sour cream for a tangy twist, or add crumbled bacon for extra crunch. You can even experiment with different spices like smoked paprika for a kick. Storing & Reheating Fried Pickle Dip Store any leftovers in an airtight container in the fridge for up to three days. When ready to enjoy, gently reheat in the microwave, stirring occasionally to maintain that creamy texture without overcooking. The first time I made Fried Pickle Dip, my friends couldn’t stop raving about it—it disappeared faster than I could grab a spoon! It’s become a go-to recipe for our game nights, and I’ve even learned to make a double batch just to keep the peace. FAQs About Fried Pickle Dip What is Fried Pickle Dip? Fried Pickle Dip is a creamy, tangy appetizer that combines the distinctive flavors of dill pickles with a rich creamy base. Made primarily from sour cream, cream cheese, and tangy ranch seasoning, it gets an exciting kick from chopped dill pickles and garlic. This irresistible dip is often topped with crispy Panko bread crumbs, which create a delightful crunch that perfectly complements the creamy texture, making it an ideal party snack or game day treat. Can I customize my Fried Pickle Dip? Absolutely! One of the best aspects of Fried Pickle Dip is its versatility. You can easily swap ingredients to suit your taste. For
Delicious Cowboy Sliders Recipe for Easy Game Day Entertaining
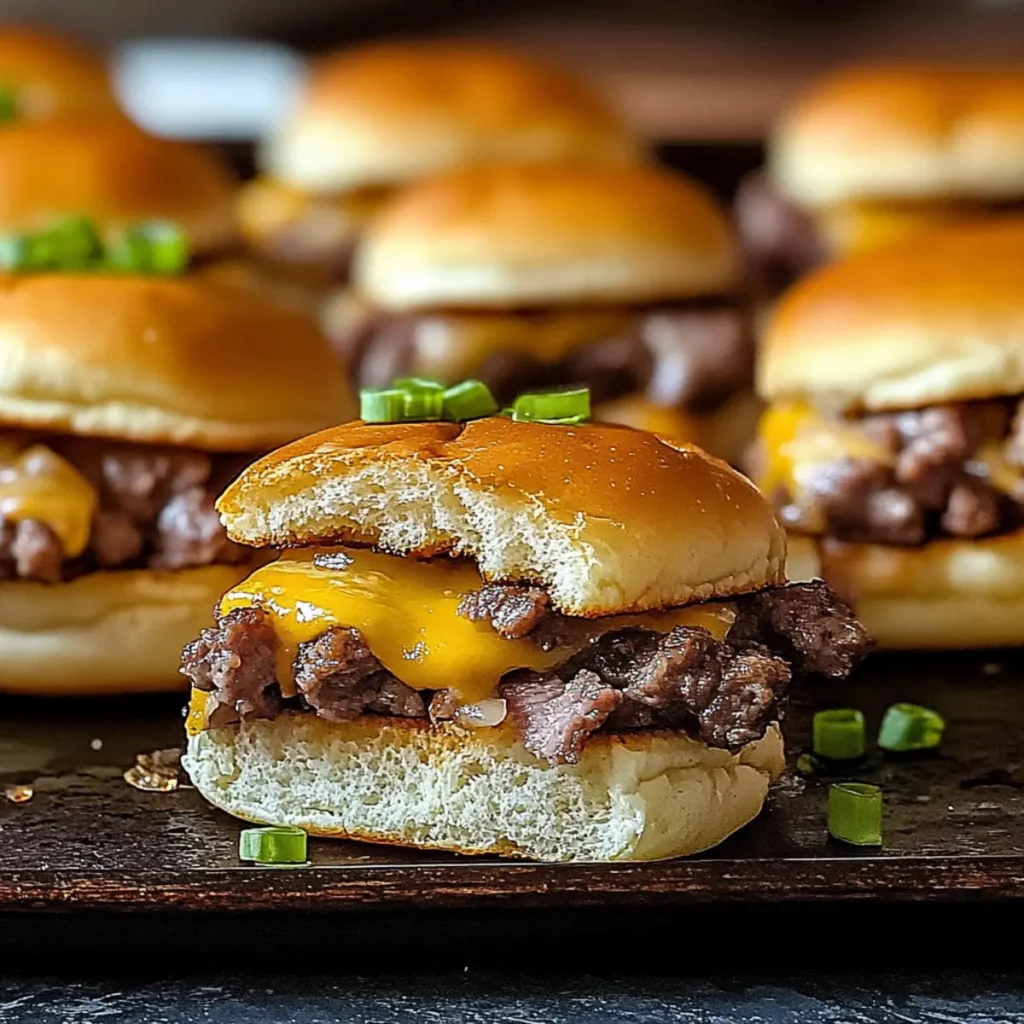
The moment you bite into a Cowboy Slider, you’re greeted with a perfect blend of juicy beef, melted cheddar, and a sweet splash of BBQ sauce that dances on your taste buds. Imagine the sizzle of patties grilling while the aroma fills your kitchen, transporting you to a sun-soaked barbecue with friends and family, where laughter flows as easily as the drinks. Whether it’s game day, a summer cookout, or a casual weeknight dinner, these Cowboy Sliders are your go-to choice for bringing people together over mouthwatering bites. Trust me, there’s nothing quite like watching everyone’s eyes light up as they unwrap these delicious little wonders! Ingredients for Cowboy Sliders Here’s what you’ll need to make this delicious Cowboy Sliders: 1 lb ground beef – Choose lean ground beef for a juicy patty that isn’t overly greasy. You can also opt for turkey or a meat substitute for a lighter option. 8 soft slider buns – Look for fresh, soft slider buns; these will cradle the patties perfectly. Feel free to use whole grain or gluten-free buns if desired. 4 oz sharp cheddar cheese (sliced) – This cheese adds a delightful richness; you can swap it with pepper jack for an extra kick. 1/2 cup sliced pickles – These tangy slices provide a crunch and sate your appetite; bread-and-butter pickles can offer a sweeter twist. 1/4 cup BBQ sauce – Use your favorite brand or homemade BBQ sauce for that smoky finish. Experiment with different flavors that suit your palate. Salt and pepper to taste – These essentials enhance the natural flavors of the meat, do not skimp! Optional: sautéed onions and lettuce – Bring extra flavor and freshness to your sliders with these optional toppings. They add a lovely texture and can be personalized to your liking. How to Make Cowboy Sliders Follow these simple steps to prepare this delicious Cowboy Sliders: Step 1: Preheat the Oven Preheat your oven to 375°F (190°C). The heat should be cozy enough to warm those buns and bring everything together. Step 2: Prepare the Beef In a mixing bowl, combine ground beef with a generous sprinkle of salt and pepper. Mix gently, as you want to keep those patties tender and juicy, not tough like a boot. Step 3: Shape the Patties Shape the beef mixture into small patties, about 2 oz each. Make them slightly larger than the slider buns to account for shrinkage while cooking — no one likes a slide-out patty! Step 4: Cook the Patties Heat a skillet over medium-high heat. Add the patties and cook for about 3 minutes per side until they’re beautifully browned. In the final minute of cooking, place a slice of cheese on each patty to melt, creating that perfect ooey-gooey goodness. Step 5: Assemble the Sliders Place each cheesy patty on a soft slider bun. Drizzle with BBQ sauce, add pickles, and toss on any optional toppings. The combination of flavors and textures at this stage will make your heart sing! Step 6: Serve and Enjoy Transfer the assembled sliders to a platter and serve them hot. Watch as friends and family dive in; these delicious little creations are sure to disappear in minutes! Now that you have a handle on these Cowboy Sliders, let the fun begin! These crowd-pleasers are perfect for any occasion where good food can spark good times. Enjoy! Perfecting Cowboy Sliders Cooking Process To achieve mouthwatering Cowboy Sliders, start by cooking the patties in a hot skillet for perfect browning. Meanwhile, lightly toast the buns for added crunch, and prep your toppings to maximize flavor and texture. Add Your Touch to Cowboy Sliders Customization is key to making these Cowboy Sliders your own! Swap out ground beef for turkey or plant-based alternatives, try different cheeses like pepper jack, or spice things up with jalapeños or your favorite BBQ sauce blend. Storing & Reheating Cowboy Sliders To store Cowboy Sliders, wrap each one in foil or an airtight container in the fridge for up to three days. Reheat in the oven at 350°F until warm or in the microwave for a quick fix, ensuring they stay delightful. Creating Cowboy Sliders always reminds me of that time I threw a spontaneous backyard barbecue. Friends devoured them within minutes, and their delighted faces, smeared with BBQ sauce, said everything! FAQs About Cowboy Sliders What are Cowboy Sliders? Cowboy Sliders are delicious mini burgers that bring the hearty flavors of the American West right to your table. Made with juicy ground beef patties, soft slider buns, and topped with sharp cheddar cheese, pickles, and tangy BBQ sauce, these little delights pack a punch. They’re perfect for parties, game days, or even a casual family dinner. With endless customization options, you can easily adapt this recipe to suit your taste, making them a favorite for everyone. How do you make Cowboy Sliders juicy? To ensure your Cowboy Sliders remain juicy and flavorful, start with high-quality ground beef, ideally with a little fat content for added moisture. Form the patties gently to avoid overworking the meat, which can lead to a denser texture. Cooking them in a hot skillet helps achieve a beautiful sear while keeping the inside tender. Adding cheese during the last minute of cooking creates a melt-in-your-mouth experience that elevates the entire slider. Can I customize Cowboy Sliders? Absolutely! One of the best aspects of Cowboy Sliders is their versatility. You can swap out ground beef for turkey or plant-based alternatives to suit dietary preferences. Experiment with different cheeses, such as pepper jack for a spicy kick or provolone for a milder flavor. Feel free to spice things up with jalapeños, sautéed bell peppers, or your favorite BBQ sauce. The sky’s the limit when it comes to personalizing your sliders. How do you store and reheat Cowboy Sliders? To store your Cowboy Sliders, wrap each one individually in foil or place them in an airtight container in the refrigerator for up to three days. When it’s time to enjoy