
Refreshing Lemon Lavender Mocktail Lemonade Recipe for Summer

Imagine a hot summer day, the sun is shining, and you find yourself dreaming of a drink so refreshing it could quench the thirst of a desert adventurer. Enter the star of today’s show: the magical Lemon Lavender Mocktail Lemonade (Pitcher). This delightful concoction marries the bright, zesty notes of fresh lemons with the fragrant, floral essence of lavender, creating an experience that dances on your taste buds like a dewy morning in a blooming garden. Picture yourself sipping this delightful mocktail at your next summer gathering or cozy afternoon picnic, the coolness of the drink contrasting beautifully with the warm sunshine. It’s the perfect way to unwind while soaking in the joy of outdoor feasting. Just one sip, and I promise you’ll be transported to a world where stress melts away faster than ice in a glass. Ingredients for Lemon Lavender Mocktail Lemonade (Pitcher) Here’s what you’ll need to make this delicious Lemon Lavender Mocktail Lemonade (Pitcher): 1 cup fresh lemon juice – For that zesty brightness that makes your mouth pucker with joy. Look for juicy, ripe lemons for the best flavor. 1 cup granulated sugar – This sweetener balances the tartness of the lemon juice. Feel free to substitute with honey or agave for a different twist. 4 cups water – A refreshing base that helps to thin out the concentrate. Use filtered water for a cleaner taste. 2 tablespoons dried culinary lavender – Adds a unique floral note that elevates the drink. Make sure to use culinary-grade lavender to ensure it’s safe for consumption. 1 cup water – For steeping the lavender and releasing its aromatic flavors. 1 lemon sliced – These slices are not just for flavor; they add a gorgeous visual element to your drink. 4 sprigs fresh lavender – These are your fancy garnishes, making your mocktail nothing short of stunning. How to Make Lemon Lavender Mocktail Lemonade (Pitcher) Follow these simple steps to prepare this delicious Lemon Lavender Mocktail Lemonade (Pitcher): Step 1: Mix Lemon Juice and Sugar In a large pitcher, pour in the fresh lemon juice. Add the sugar and stir vigorously until the granulated sugar completely dissolves—think of it as a mini workout for your arm! Step 2: Create the Lavender Infusion In a small saucepan, bring 1 cup of water to a boil. Once boiling, take the pan off the heat and add the dried culinary lavender. Allow this aromatic mixture to steep for about 10-15 minutes. You’ll know it’s ready when your kitchen smells like a fancy spa. Step 3: Strain the Lavender Using a fine strainer, carefully pour the lavender infusion into the pitcher with the lemon juice and sugar mixture. Discard the lavender flowers, but take a moment to appreciate that lovely color and aroma—they smell amazing! Step 4: Add Cold Water Now it’s time to hydrate your creation! Add the 4 cups of cold water to the pitcher. Stir everything together gently, making sure all ingredients are well combined. This is where the magic begins to unfold. Step 5: Chill and Garnish Serve your Lemon Lavender Mocktail Lemonade over ice in your favorite glasses. Add lemon slices and a sprig of fresh lavender to each glass for that Instagram-worthy finish. Step 6: Enjoy! Take a moment to appreciate what you’ve just created. Sip slowly, close your eyes, and let the blend of tangy lemons and soothing lavender whisk you away to your own personal oasis. As the weather heats up, the Lemon Lavender Mocktail Lemonade (Pitcher) promises to keep you cool and relaxed. Whether you’re hosting a backyard barbecue, lounging by the pool, or just dreaming of a sun-soaked escape, this drink is sure to impress. So why not gather your friends and make this delightful refreshment together? Your summer just got an extraordinary upgrade! Perfecting Lemon Lavender Mocktail Lemonade (Pitcher) Cooking Process Start by mixing the fresh lemon juice and sugar until the sugar dissolves. Meanwhile, steep the lavender in boiling water, then combine everything to create a refreshing drink that’s ideal for summer. Add Your Touch to Lemon Lavender Mocktail Lemonade (Pitcher) Feel free to swap out the sugar for agave syrup or honey for a more natural sweetness. You can also experiment with different types of citrus, like lime or orange, for a unique twist. Storing & Reheating Lemon Lavender Mocktail Lemonade (Pitcher) Store any leftover Lemon Lavender Mocktail Lemonade in an airtight container in the fridge for up to three days. Simply give it a stir before serving to reintroduce the flavors. Sharing this drink at a summer gathering brought back compliments from friends who couldn’t believe it was homemade; the combination of lemon and lavender had them swooning! FAQs About Lemon Lavender Mocktail Lemonade (Pitcher) What is Lemon Lavender Mocktail Lemonade (Pitcher)? Lemon Lavender Mocktail Lemonade (Pitcher) is a delightful non-alcoholic beverage that combines the zesty freshness of lemon juice with the floral notes of culinary lavender. This refreshing drink is perfect for hot summer days and is ideal for gatherings or quiet afternoons on the porch. With just a few simple ingredients like fresh lemon juice, sugar, and lavender, you can create a vibrant drink that adds a touch of elegance to any occasion. Perfectly sweetened and beautifully garnished, it’s sure to impress anyone who takes a sip. How do I make Lemon Lavender Mocktail Lemonade (Pitcher)? Making Lemon Lavender Mocktail Lemonade (Pitcher) is simple and quick! Begin by mixing fresh lemon juice with granulated sugar until the sugar dissolves. Next, steep dried culinary lavender in boiling water for about ten minutes, allowing the flavors to infuse. Strain the lavender mixture into the pitcher, combine with cold water, and give it a good stir. Finally, serve over ice, garnished with fresh lemon slices and lavender sprigs for an extra touch of flair. Can I customize my Lemon Lavender Mocktail Lemonade (Pitcher)? Absolutely! This drink is versatile and open to customization. Instead of white sugar, you can use honey or agave syrup for a natural sweetness. For a
Refreshing Spring Garden Party Punch with Strawberry Lemon Flavor

Refreshing Spring Garden Party Punch with Strawberry Lemon Flavor brings the essence of sunshine and laughter right to your glass. This delightful concoction bursts with the vibrant flavors of juicy strawberries and tangy lemons, making it an instant favorite for any gathering. The aromatic sweetness that wafts through the air will create an ambiance worth celebrating. Imagine a warm spring afternoon, surrounded by friends and family, the sun casting a golden hue on your garden, and this invigorating punch served in colorful glasses with ice clinking merrily. That’s the kind of magic this drink delivers. Ingredients for Spring Garden Party Punch (Strawberry Lemon) Here’s what you’ll need to make this delicious Spring Garden Party Punch (Strawberry Lemon): 1 cup fresh strawberries – Choose ripe, juicy strawberries for the best flavor. Slice them up to release their beautiful juices. 1 cup fresh lemon juice – Freshly squeezed lemon juice will elevate the punch with zesty vibrance. Avoid the bottled kind if you can. 1 cup sparkling water or lemon-lime soda – The bubbly carbonation adds a refreshing effervescence; the soda brings extra sweetness if you prefer. 1 cup simple syrup – This sweetener balances the tartness of the lemon. You can make it easily at home by dissolving equal parts sugar and water over heat. How to Make Spring Garden Party Punch (Strawberry Lemon) Follow these simple steps to prepare this delicious Spring Garden Party Punch (Strawberry Lemon): Step 1: Gather Your Tools Make sure you have a large pitcher, a cutting board, and a knife ready. You might also want some ice cubes handy for serving. Step 2: Prepare the Strawberries Slice the fresh strawberries and toss them into your pitcher. Their vibrant red color will be a feast for the eyes, and your kitchen will start to smell amazing already! Step 3: Add the Lemon Juice Pour the freshly squeezed lemon juice over the strawberries in the pitcher. Give it a little stir and admire the beautiful fusion of colors and aromas. Step 4: Incorporate the Sparkling Water Gently add the sparkling water or lemon-lime soda, depending on your preference. Be careful here; we want to keep that fizz alive! Step 5: Sweeten the Deal Drizzle in the simple syrup and stir the mixture gently to combine all those glorious elements. Taste the punch, and if it needs a bit more sweetness, feel free to add more syrup. Step 6: Serve and Enjoy Pour the refreshing punch over ice in individual glasses. Optionally garnish with a sprig of mint or a slice of lemon for that extra dash of flair. Now sit back and watch your guests’ faces light up with delight! Whether it’s a springtime soiree, a picnic under the cherry blossoms, or a simple weekend brunch, this Spring Garden Party Punch (Strawberry Lemon) is the perfect sip to celebrate life’s beautiful moments. After all, nothing says good times quite like refreshing drinks shared among good company. So raise your glass and toast to laughter, love, and delicious flavors! Perfecting Spring Garden Party Punch (Strawberry Lemon) Cooking Process To create the ideal Spring Garden Party Punch (Strawberry Lemon), start by slicing fresh strawberries and extracting juicy lemon goodness. Combine the strawberries and lemon juice first, then whisk in the sparkling water and simple syrup for a refreshing, fizzy delight. Add Your Touch to Spring Garden Party Punch (Strawberry Lemon) Feel free to customize your Spring Garden Party Punch (Strawberry Lemon) by swapping out strawberries for other seasonal fruits like raspberries or blueberries. Adding fresh mint leaves or a splash of gin can elevate the punch to a new level of refreshing sophistication. Storing & Reheating Spring Garden Party Punch (Strawberry Lemon) If you have leftover Spring Garden Party Punch (Strawberry Lemon), store it in the refrigerator in a sealed pitcher for up to two days. Avoid freezing the punch as the sparkling water may lose its fizz when thawed. Sharing this punch recipe always reminds me of the time my friends threw a surprise picnic for me using my favorite flavors. Watching everyone sip on it, their smiles widened as they discovered how simple yet delicious it was. It turned a regular afternoon into a joyful celebration. FAQs About Spring Garden Party Punch (Strawberry Lemon) What is Spring Garden Party Punch (Strawberry Lemon)? Spring Garden Party Punch (Strawberry Lemon) is a refreshing, fruity drink that beautifully combines the sweet essence of strawberries with the zesty brightness of fresh lemon juice. This delightful beverage features sparkling water or lemon-lime soda for that fizzy touch, while simple syrup sweetens the mix just right. Perfect for any gathering, it delivers a burst of happiness and flavor that can brighten up any spring occasion! How can I customize my Spring Garden Party Punch (Strawberry Lemon)? You can easily personalize your Spring Garden Party Punch (Strawberry Lemon) to suit your taste or seasonal fruit availability. Swap out strawberries for other fruits like raspberries, blueberries, or even peaches. For added flair, toss in some fresh mint leaves or a splash of your favorite spirit, such as gin or vodka, for an adult twist that elevates your punch into a cocktail. Let your creativity shine! How should I store any leftover Spring Garden Party Punch (Strawberry Lemon)? If you happen to have leftovers of your Spring Garden Party Punch (Strawberry Lemon), simply store it in the refrigerator in a sealed pitcher. It can last for up to two days, retaining its delicious fruity flavors. However, be cautious about freezing it; the sparkling water may lose its fizz when thawed, so it’s best enjoyed fresh. Can I make Spring Garden Party Punch (Strawberry Lemon) ahead of time? Absolutely! You can prepare many components of the Spring Garden Party Punch (Strawberry Lemon) ahead of time. Mix the sliced strawberries with lemon juice and simple syrup in advance, and chill them until you’re ready to serve. Just before serving, add the sparkling water or soda for that fizzy finish. This way, your punch is ready to impress
Delicious Prosciutto Mozzarella Skewers for Easy Appetizers

The delicious Prosciutto Mozzarella Skewers are everything your summer picnics or cozy family evenings need. Imagine the savory richness of prosciutto, combined with the creamy, delightful burst of fresh mozzarella, all enhanced by juicy cherry tomatoes and aromatic basil. Picture these vibrant colors on your table, creating an ambiance that begs you to take a delightful bite. Whenever I whip up these Prosciutto Mozzarella Skewers, I am flooded with fond memories of summer barbecues with family and friends. You know, those perfect evenings when laughter mingles with the delicious smells of good food bubbling on the grill? These skewers fit right into that vibe—easy to make, pleasing to the eye, and utterly delicious! Ingredients for Prosciutto Mozzarella Skewers Here’s what you’ll need to make this delicious Prosciutto Mozzarella Skewers: 4 oz prosciutto – Choose thinly sliced prosciutto for a nice balance of salty flavor and a melt-in-your-mouth texture that complements the cheese beautifully. 8 oz fresh mozzarella balls – Look for high-quality, fresh mozzarella (bocconcini) for that creamy indulgence. You can usually find these in the deli section of your grocery store. 1 cup cherry tomatoes – Select ripe, juicy cherry tomatoes for a burst of sweetness. If you want to get fancy, grab a mix of colors for visual appeal. 1/2 cup fresh basil leaves – Fresh basil not only adds a lovely fragrance but provides a fresh, peppery bite that rounds out the skewers perfectly. 2 tbsp olive oil – Use high-quality extra virgin olive oil for drizzling to enhance the flavors of your ingredients. Balsamic glaze (optional) – This adds a sweet-tangy finish that will elevate your skewers. Feel free to drizzle generously! How to Make Prosciutto Mozzarella Skewers Follow these simple steps to prepare this delicious Prosciutto Mozzarella Skewers: Step 1: Gather Your Tools Gather wooden or metal skewers, a cutting board, and a knife. You’ll need these to make assembly a breeze. Step 2: Prepare the Ingredients If necessary, slice larger cherry tomatoes in half to make your skewers more balanced. Tear the basil leaves into smaller pieces for easy handling. Step 3: Assemble the Skewers Start the assembly process by threading one cherry tomato onto the skewer. Follow it with a mozzarella ball, then take a slice of prosciutto and fold it around the mozzarella. Step 4: The Finishing Touch Finish off your skewers with another tomato half and a basil leaf on top. Repeat this process until you’ve used up all your delicious ingredients or have reached your desired number of skewers. Step 5: Drizzle with Flavor Arrange your gorgeous skewers on a platter and drizzle them generously with olive oil. If you’re feeling fancy, don’t forget the balsamic glaze for that extra pop of flavor. Step 6: Serve and Enjoy Prepare your taste buds for the explosion of flavors and aromas as you serve these delightful Prosciutto Mozzarella Skewers. They make a perfect appetizer or snack for any occasion! Each bite of these Prosciutto Mozzarella Skewers is a combo of flavors that dances on your palate—salty, creamy, tangy, and fresh. Whether it’s a backyard BBQ, a dinner party, or just a lovely family gathering, these skewers are bound to become a staple. As they disappear off the platter, surrounded by laughter and joy, you’ll be glad you decided to take this culinary adventure. Enjoy them while they last! You Must Know About Prosciutto Mozzarella Skewers This showstopping Prosciutto Mozzarella Skewers delivers restaurant-quality results using simple ingredients you probably already have at home. The perfect balance of textures and flavors creates an unforgettable dining experience that will have everyone asking for seconds. Picture-perfect presentation with vibrant colors makes this dish absolutely Instagram-worthy and guaranteed to impress any dinner guest. Incredibly versatile recipe that works beautifully for weeknight dinners, meal prep, special occasions, or even outdoor entertaining sessions. Perfecting Prosciutto Mozzarella Skewers Cooking Process The best approach to assembly is to gather all ingredients first. Start by threading the cherry tomato, followed by mozzarella, then wrap the prosciutto around the mozzarella. Cap it off with another tomato and a basil leaf, creating a delicious flavor bomb on each skewer. Add Your Touch to Prosciutto Mozzarella Skewers Get creative by substituting salami for prosciutto for a different flavor profile or adding olives for a Mediterranean twist. Experiment with different herbs like oregano or thyme to elevate the taste even more. Storing & Reheating Prosciutto Mozzarella Skewers Store any leftover skewers in an airtight container in the refrigerator for up to two days. To reheat, briefly place them in a pan over low heat, ensuring the mozzarella doesn’t become rubbery. There was a summer evening when I made Prosciutto Mozzarella Skewers for a small gathering. The laughter and compliments poured in, and I realized that good food creates not just memories but connections. FAQs About Prosciutto Mozzarella Skewers What is Prosciutto Mozzarella Skewers? Prosciutto Mozzarella Skewers are a simple yet elegant appetizer that combines the rich flavors of prosciutto and fresh mozzarella with the vibrant touch of cherry tomatoes and basil. These delightful bites are not only visually appealing, but they also provide a delicious balance of salty, creamy, and fresh flavors. Perfect for any gathering, these skewers can be assembled in under ten minutes, making them an ideal choice for busy hosts wanting to impress their guests. How do you store remaining Prosciutto Mozzarella Skewers? To keep any leftover Prosciutto Mozzarella Skewers fresh, store them in an airtight container in the refrigerator. They will remain good for up to two days. However, retaining their ideal taste and texture is best if consumed within the same day. If you plan to enjoy them later, consider removing the basil leaves before storage, as they can wilt and lose flavor. Can you customize your Prosciutto Mozzarella Skewers? Absolutely! Customization is one of the best parts of making Prosciutto Mozzarella Skewers. Feel free to swap prosciutto with another favorite cured meat like salami or add in some olives for a Mediterranean twist. You can experiment with different herbs
Delicious Hawaiian Roll Cheeseburger Sliders Recipe in 30 Minutes

Are you ready to sink your teeth into something deliciously fun? Hawaiian Roll Cheeseburger Sliders are the answer to your cravings! These little bites of heaven pack a flavorful punch that’ll make your taste buds dance like they’re in a hula contest. Imagine gooey cheese melting over juicy beef patties, all cozied up in sweet rolls that practically sing with tropical joy. These sliders are not only a fantastic way to impress your friends at your next gathering, but they also promise to be easy on the eyes and the taste buds, making them a perfect crowd-pleaser. Think about those golden, sun-kissed afternoons as you whip up this delightful dish, whether it’s for a casual get-together, a Game Day feast, or just a cozy family dinner. You might even find yourself reminiscing about backyard barbecues and sandy beach picnics while savoring each mouthful. With every bite, you’ll feel the excitement build, anticipating the amazing explosion of flavors headed your way. These sliders are bound to become a cherished recipe in your home, making every occasion a little more special. Ingredients for Hawaiian Roll Cheeseburger Sliders Here’s what you’ll need to make this delicious Hawaiian Roll Cheeseburger Sliders: 12 Hawaiian Sweet Rolls – These delightful rolls are soft, slightly sweet, and perfect for soaking up the savory juices from the sliders. 1 lb ground beef – Use ground beef with a good fat content (around 80/20) for that juicy flavor-packed bite. 6 slices American cheese – Who doesn’t love the melty goodness of American cheese? It adds creaminess and a comforting flavor. 1 tsp onion powder – This simple spice enhances the meat’s flavor without overwhelming it. 2 tbsp ketchup – A classic condiment that adds sweetness and tang to balance the savory beef. 2 tbsp mustard – Perfect for a bit of zest, this condiment complements the flavors wonderfully. 1 cup dill pickles – These crunchy delights bring a refreshing contrast to the sliders and cut through the richness. 1 cup lettuce – Add some crunch and freshness with crispy lettuce to make these sliders even more delightful. 1 medium tomato – Sliced tomatoes provide juiciness and a burst of flavor with every bite! How to Make Hawaiian Roll Cheeseburger Sliders Follow these simple steps to prepare this delicious Hawaiian Roll Cheeseburger Sliders: Step 1: Preheat the Oven Begin by preheating your oven to 350°F (175°C). Give it a few moments to heat up while you get everything else ready. Step 2: Prepare the Patties In a mixing bowl, combine the ground beef with onion powder, salt, and pepper. Get your hands a little messy and form the mixture into eight small, friendly patties, each about the size of your rolls. Step 3: Cook the Patties Heat a skillet over medium-high heat and add the patties. Cook for about 3 minutes on each side, keeping an eye on them. As they begin to cook, place a slice of cheese on each patty during the last minute of cooking time to create that gooey goodness we all crave. Step 4: Assemble the Sliders Grab those Hawaiian rolls and slice them in half horizontally—you can do this just like slicing a loaf of bread. Place the bottom halves in a baking dish and layer those glorious, cheesy beef patties generously. Step 5: Add the Toppings Squeeze in some ketchup and mustard on top of the patties, then layer on those crunchy dill pickles, fresh lettuce, and vibrant tomato slices. These toppings are the cherry on top of your flavorful creation. Step 6: Bake to Perfection Finally, place the top halves of the rolls back on and pop your baking dish into the preheated oven. Bake for an extra 5 minutes until everything is heated through. Remove from the oven and let the sliders rest for a minute before serving. Transfer to plates and garnish as desired. These Hawaiian Roll Cheeseburger Sliders are perfect for sharing, so get ready to dig in and enjoy! You’ll find that each delightful bite is bursting with flavor and a hint of sunny paradise. No matter how you serve them, your sliders will undoubtedly bring smiles to faces and laughter to the table. Enjoy your feast! You Must Know About Hawaiian Roll Cheeseburger Sliders This showstopping Hawaiian Roll Cheeseburger Sliders delivers restaurant-quality results using simple ingredients you probably already have at home. The perfect balance of textures and flavors creates an unforgettable dining experience that will have everyone asking for seconds. Picture-perfect presentation with vibrant colors makes this dish absolutely Instagram-worthy and guaranteed to impress any dinner guest. Incredibly versatile recipe that works beautifully for weeknight dinners, meal prep, special occasions, or even outdoor entertaining sessions. Perfecting Hawaiian Roll Cheeseburger Sliders Cooking Process To achieve the best results with your Hawaiian Roll Cheeseburger Sliders, start by preheating the oven. While it’s warming up, mix the ground beef and seasonings, then form your patties. Sear them in a skillet before layering in the baking dish for an incredible finish. Add Your Touch to Hawaiian Roll Cheeseburger Sliders Personalize your Hawaiian Roll Cheeseburger Sliders by swapping out the American cheese for cheddar or pepper jack for some extra kick. You can also jazz it up with sautéed onions, jalapeños, or even barbecue sauce for a sweet and tangy twist. Storing & Reheating Hawaiian Roll Cheeseburger Sliders For optimal storage, keep your Hawaiian Roll Cheeseburger Sliders in an airtight container in the refrigerator for up to three days. To reheat, simply pop them back in the oven or microwave until warmed through, keeping that cheesy goodness intact. The first time I made Hawaiian Roll Cheeseburger Sliders for a get-together, my friends couldn’t get enough! They devoured them in minutes, and I remember the smiles on their faces—it felt like a food hug. FAQs About Hawaiian Roll Cheeseburger Sliders What is Hawaiian Roll Cheeseburger Sliders? Hawaiian Roll Cheeseburger Sliders are a delightful twist on the classic cheeseburger, offering a fun and easy way to serve your favorite burger flavors in
Delicious Jalapeno Popper Soup Recipe for Spicy Comfort Food

There’s something magical about a bowl of Jalapeno Popper Soup, isn’t there? Picture this creamy concoction swirling with vibrant green jalapeños, crispy bacon bits, and luscious cheddar cheese, all enveloped in a warm broth that smells as good as it tastes. Whether it’s a chilly evening or a lively gathering, this delicious Jalapeno Popper Soup instantly elevates the mood and stirs the appetite. This unique soup is more than just a dish; it’s an experience, a nostalgic nod to those mouthwatering jalapeño poppers we all adore. With each spoonful, the creamy texture and spicy kick take you back to fond memories of family gatherings or that one perfect meal shared with friends. So, grab your apron and let’s embark on this flavor-filled journey that promises to warm your heart and spice up your soul! Ingredients for Jalapeno Popper Soup Here’s what you’ll need to make this delicious Jalapeno Popper Soup: 2 cups fresh jalapeños – Diced, with seeds removed for a milder flavor. Adjust based on your heat preference. 8 oz cream cheese – Softened to make stirring easy and provide a rich, creamy base. 4 cups low-sodium chicken broth – Use low-sodium to keep the soup flavorful without too much salt. 4 oz bacon – Chopped and cooked until crispy. This adds an irresistible crunch and smoky flavor. 1 cup shredded sharp cheddar cheese – Melts beautifully to create that signature gooeyness we love. 1 medium onion – Diced for a sweet aroma and flavor base. 3 cloves garlic – Minced to enhance the overall flavor profile with a kick. How to Make Jalapeno Popper Soup Follow these simple steps to prepare this delicious Jalapeno Popper Soup: Step 1: Cook the Bacon In a large pot over medium heat, cook the chopped bacon until it’s crispy and golden. The drippings left behind in the pot will enhance the flavors of the soup. Once the bacon is done, remove it and set it aside for later use. Step 2: Sauté the Aromatics Using the same pot, add the diced onions and sauté until they become translucent, releasing that mouthwatering aroma we all love. Add the minced garlic and diced jalapeños, cooking until everything is fragrant and inviting. Step 3: Blend in the Cream Cheese Lower the heat and stir in the softened cream cheese. Keep stirring until it melts into a creamy mixture. The transformation of this cheese is the moment that looks and smells like heaven. Step 4: Add the Chicken Broth Gradually pour in the low-sodium chicken broth, stirring continuously. Increase the heat slightly and bring the mixture to a gentle simmer for about five minutes, letting all the flavors meld beautifully. Step 5: Incorporate the Cheese Mix in the shredded sharp cheddar cheese, stirring until it melts and becomes one with the soup. This is where the magic happens! The soup should now be creamy, cheesy, and utterly delightful. Step 6: Serve and Garnish Transfer the soup to bowls and garnish with the crispy bacon bits and, if you’re feeling indulgent, some extra shredded cheddar on top. Serve hot and enjoy the delightful flavors with every spoonful! Now that we’ve made our creamy and spicy Jalapeno Popper Soup, why not get creative? You can drizzle some sour cream on top, sprinkle on fresh cilantro, or even toss in a few avocado slices for an added twist. Perfect for a cozy night in, a family dinner, or even as a hit at your next gathering, this soup brings comfort and joy with every bowl. So, gather your loved ones, and let the good times and hearty laughter flow! Perfecting Jalapeno Popper Soup Cooking Process To achieve the most flavorful Jalapeno Popper Soup, start by cooking the bacon until crispy. Sauté onions and garlic in the bacon drippings, then add jalapeños. Finally, melt in cream cheese and stir in the broth for a creamy finish. Add Your Touch to Jalapeno Popper Soup Feel free to customize your Jalapeno Popper Soup by adding ingredients like rotisserie chicken for extra protein or different cheeses for a unique flavor. You can spice things up with some smoked paprika or even a dash of cumin for added depth. Storing & Reheating Jalapeno Popper Soup To store your Jalapeno Popper Soup, let it cool completely before transferring it to an airtight container. It keeps in the refrigerator for up to three days. When reheating, do so gently on the stove over medium-low heat, adding a splash of broth if it thickens. Sharing my first attempt at this Jalapeno Popper Soup brings back memories of friends gathering around my kitchen, raving about the creamy texture and smoky bacon. Their compliments made the effort worthwhile and turned a simple meal into a memorable experience. FAQs About Jalapeno Popper Soup What is Jalapeno Popper Soup? Jalapeno Popper Soup is a creamy and spicy dish inspired by the popular appetizer, jalapeno poppers. It blends the kick of fresh jalapenos with silky cream cheese, crispy bacon, and sharp cheddar cheese in a rich chicken broth. This warm, comforting soup is perfect for those who love a bit of heat and a lot of flavor. It’s easy to prepare and makes for a delightful meal on chilly evenings or whenever you’re craving something hearty yet simple. How can I customize Jalapeno Popper Soup? You can easily customize your Jalapeno Popper Soup to fit your tastes or dietary needs. Add protein like shredded rotisserie chicken or white beans for extra heartiness. Feel free to swap in other cheeses like pepper jack or gouda for a flavor twist. If you enjoy additional spice, consider incorporating smoked paprika or cumin while cooking. For a fresh touch, add chopped cilantro or scallions as a garnish before serving. The beauty of this soup lies in its versatility! What should I serve with Jalapeno Popper Soup? Pair your Jalapeno Popper Soup with a side that complements its creamy and spicy nature. Try serving it with crusty bread or with corn muffins for a delightful contrast
Delicious Smashed Broccoli Recipe with Garlic and Parmesan
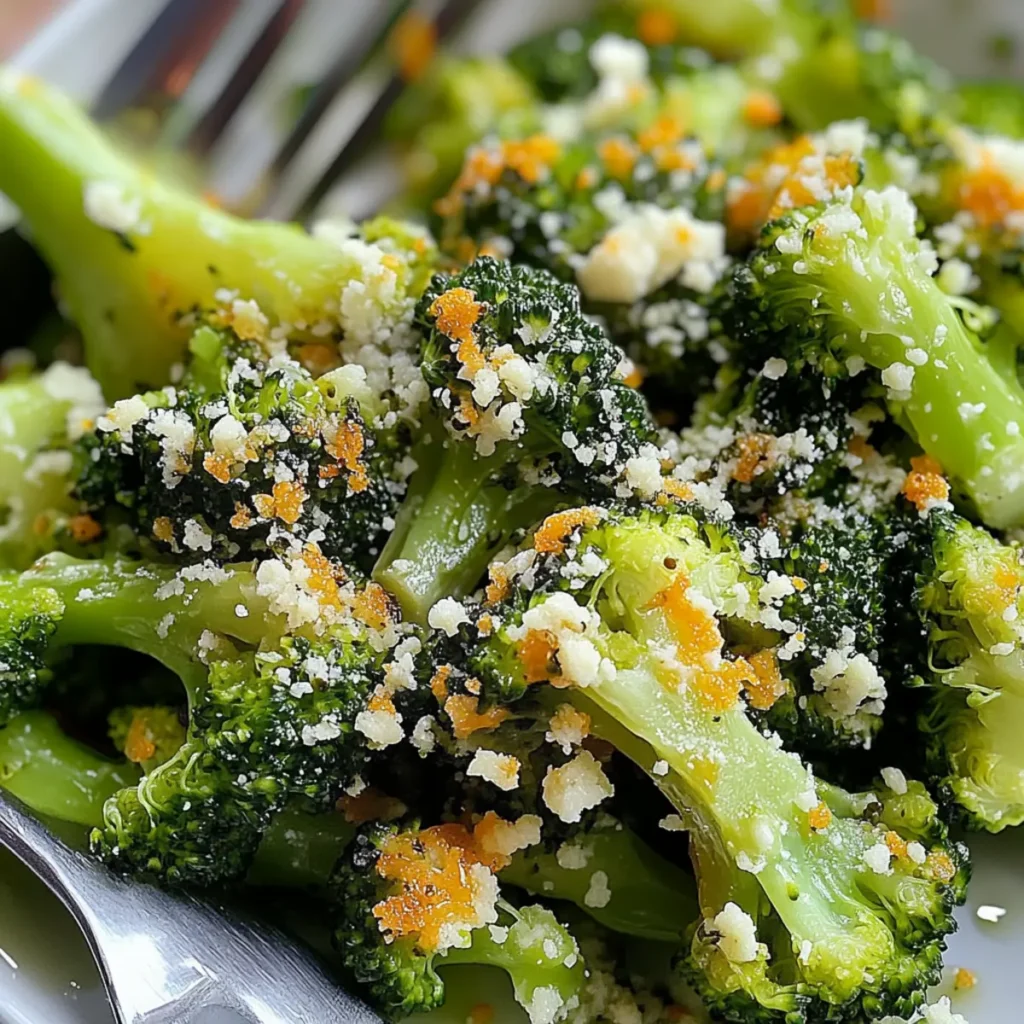
Smashed broccoli is one of those dishes that captivate your senses the moment you catch a whiff of its garlicky aroma wafting through the kitchen. The sight of those vibrant green florets, gently smashed to release their essence, adds not just flavor to your meal but a burst of color to your plate. It’s a dish that screams comfort, yet it carries a surprising elegance, making it the perfect side dish for family dinners or even fancy occasions. Picture this: it’s a chilly evening, and you’re hunkered down at home after a long day. You’re craving something delicious, but you also want to keep it light and healthy. Enter smashed broccoli, a dish that not only tantalizes your taste buds but can also evoke warm memories of childhood dinners spent at the family table. Whether you’re enjoying it alongside grilled chicken or as part of a vegetarian feast, this dish promises delightful flavors and a crispy texture that will leave you longing for seconds. Ingredients for Smashed Broccoli Here’s what you’ll need to make this delicious smashed broccoli: 4 cups fresh broccoli florets – Look for vibrant green florets that are firm and tightly packed; they should be crisp and fresh for the best flavor. 2 tbsp extra virgin olive oil – This will add rich flavor and help in achieving that beautiful roasted finish when baked. 2 garlic cloves, minced – Freshly minced garlic brings a lovely aroma and adds depth to the dish, so don’t skimp on it. 1 tbsp freshly squeezed lemon juice – A splash of lemon juice brightens the flavors and complements the earthy taste of broccoli wonderfully. Salt and pepper to taste – Essential for seasoning and enhancing all the delicious flavors in your smashed broccoli. ¼ cup freshly grated Parmesan cheese (optional) – For those who want to take it up a notch, this adds a nutty finish that’s simply irresistible. How to Make Smashed Broccoli Follow these simple steps to prepare this delicious smashed broccoli: Step 1: Prepare the Broccoli Begin by washing your broccoli florets under cold water, ensuring to remove any residual dirt. Cut them into bite-sized pieces to help them cook evenly. Step 2: Boil the Broccoli Bring a pot of salted water to a robust boil. Carefully add your broccoli and let it cook for about 3-4 minutes until it’s tender yet still has that vibrant, green color. Drain the broccoli in a colander. Step 3: Smash the Broccoli Transfer the drained, steaming broccoli to a large bowl. Using a fork or a potato masher, gently smash the florets to your desired texture. You want to break them up without turning them to mush. Step 4: Flavor it Up Drizzle the smashed broccoli with extra virgin olive oil and add the minced garlic. Season with salt and pepper to taste, tossing gently to combine everything beautifully. Step 5: Bake for Extra Crispiness If you love crispy edges (and who doesn’t?), spread the mixture on a baking sheet lined with parchment paper. Pop it into a preheated oven at 400°F (200°C) and bake for about 10 minutes, keeping an eye on it until it turns a lovely golden color. Step 6: The Finishing Touch When your smashed broccoli comes out of the oven, feel free to sprinkle it with freshly grated Parmesan cheese for that extra oomph! It’s now ready to serve warm. Serve your smashed broccoli as a side dish or let it take center stage on a cozy weeknight dinner. Regardless of how you enjoy it, this dish effortlessly combines ease and flavor, making it a perfect choice for any occasion. Bon appétit! Perfecting Smashed Broccoli Cooking Process To achieve perfect results with your Smashed Broccoli, start by boiling the broccoli first. While it’s cooking, prepare the garlic and olive oil mixture. When the broccoli is tender, smash it before tossing with the seasoning, ensuring every bite is flavorful. Add Your Touch to Smashed Broccoli Make this Smashed Broccoli your own by swapping out the garlic for shallots or adding a sprinkle of chili flakes for some heat. Toss in some toasted nuts or different cheese varieties for an unexpected twist, like feta or gouda. Storing & Reheating Smashed Broccoli To store your Smashed Broccoli, place it in an airtight container in the refrigerator for up to three days. When reheating, use a skillet on medium-low heat to preserve the crispy edges and vibrant flavor. Sometimes, the simplest recipes leave the biggest impressions. I vividly remember a dinner party where everyone raved about this Smashed Broccoli, forgetting the main course completely. It’s moments like these that remind me why I love cooking. FAQs About Smashed Broccoli What is Smashed Broccoli? Smashed Broccoli is a delightful dish that elevates simple broccoli florets into a vibrant and flavorful side. This recipe involves steaming the broccoli until tender and then lightly smashing it to maintain some texture. The addition of garlic, olive oil, lemon juice, and optional Parmesan cheese not only enhances the flavor but also makes it visually appealing. Whether as a side dish for a weekday meal or a fancy addition to a dinner party, Smashed Broccoli is versatile and sure to impress. How do I make Smashed Broccoli clean and healthy? Making Smashed Broccoli clean and healthy is straightforward. Start by choosing fresh, organic broccoli without blemishes. Opt for high-quality extra virgin olive oil for its health benefits, including healthy fats. Limit the amount of salt used, or even try salt alternatives for added flavor. You can also skip the cheese or substitute it with a healthier option like nutritional yeast for a cheesy flavor without the fat. Can I customize my Smashed Broccoli recipe? Absolutely, customizing your Smashed Broccoli is part of the fun! Consider adding toasted nuts like almonds or walnuts for crunch. You can swap out the garlic for shallots or even add chili flakes for a spicy kick. For a creamy twist, you might experiment with different cheeses, such as feta or
Delicious Toasted Ravioli Recipe Baked to Golden Perfection

Toasted Ravioli is like a culinary hug wrapped in warm, crispy goodness that you can pop into your mouth at any time. Imagine sinking your teeth into a golden-brown, crispy shell, only to discover the heavenly cheese filling inside that’s just waiting to dance on your taste buds. It’s a delicious combination of flavors, textures, and aromas that instantly transports you to a cozy Italian eatery, even if you’re just lounging on your couch in your pajamas. This dish isn’t just about the taste; it’s about the memories it creates. Picture family gatherings, where laughter echoes, and plates overflow with food. Toasted Ravioli is a star at these events, perfect for sharing, snacking, or enjoying as a quick dinner mid-week when the thought of take-out makes you groan. Whatever the occasion, this dish promises an amazing flavor experience. Ingredients for Toasted Ravioli Here’s what you’ll need to make this delicious Toasted Ravioli: 1 package (9 oz) frozen cheese ravioli – Go for the cheese-filled ones; they provide the gooey goodness we crave. 1 cup Italian-seasoned breadcrumbs – These add that delightful crunch and flavor; feel free to use plain breadcrumbs with Italian spices if needed. 2 large eggs – These are your binding heroes, helping the breadcrumbs adhere to the ravioli. 1/2 cup freshly grated Parmesan cheese – The sprinkle of zestiness that makes everything better. Plus, freshly grated brings more flavor than pre-grated. 1/4 cup marinara sauce (for serving) – A classic dipping companion perfect for that extra punch of flavor. 2 tsp olive oil – A drizzle for enhancing flavors and promoting crispiness during baking. How to Make Toasted Ravioli Follow these simple steps to prepare this delicious Toasted Ravioli: Step 1: Preheat the Oven Start by preheating your oven to 425°F (220°C). This ensures that your ravioli will cook evenly and turn golden brown and crispy! Step 2: Prepare the Egg Mixture In a mixing bowl, beat the two eggs until blended and frothy, like you’re whisking away bad vibes. This egg wash will help your breadcrumbs stick like a good friend who never leaves your side. Step 3: Make the Breadcrumb Mixture In another bowl, combine the Italian-seasoned breadcrumbs and freshly grated Parmesan cheese. Mix them well until they look like a delicious beach for your ravioli to bask in. Step 4: Coat the Ravioli Dip each frozen cheese ravioli first into the egg mixture, making sure to give it a good soak. Then, roll it in the breadcrumb mixture until it’s fully coated, like a cozy blanket on a chilly day. Step 5: Arrange on a Baking Sheet Place your beautifully coated ravioli on a parchment-lined baking sheet, ensuring they have some space to breathe. Drizzle with olive oil to ensure they get crispy and don’t miss out on any flavor. Step 6: Bake to Perfection Slide the baking sheet into your preheated oven and bake for about 12-15 minutes. Flip the ravioli halfway through to let them achieve that perfect golden brown on both sides, like a high-five between the oven and each piece. Once you’re done baking, serve them hot with a side of marinara sauce for dipping, and take a moment to relish the crunchy texture paired with the savory cheese interior. You certainly deserve it! Perfecting Toasted Ravioli Cooking Process To achieve mouthwatering Toasted Ravioli, begin by preheating your oven, then prepare the egg mixture and the breadcrumb blend simultaneously. This strategy ensures that every piece is perfectly coated and ready for a golden finish in no time. Add Your Touch to Toasted Ravioli Feel free to get creative with your Toasted Ravioli by adding spices like garlic powder or red pepper flakes to the breadcrumb mix. You could also swap out marinara for pesto or Alfredo sauce for dipping to mix things up. Storing & Reheating Toasted Ravioli To store leftover Toasted Ravioli, seal them in an airtight container in the fridge for up to three days. Reheat them in a preheated oven at 350°F (175°C) for about 10 minutes to keep that crispy texture. Nothing warms my heart quite like the smiles on my friends’ faces when they devoured these Toasted Ravioli at our last dinner party. It was a soothing reminder that great food brings people together in the best way possible. FAQs About Toasted Ravioli What is Toasted Ravioli? Toasted ravioli is a delightful twist on the classic Italian dish. Typically made with cheese-filled pasta, these little pockets are breaded and baked or fried to achieve a satisfying crunch. Originating from St. Louis, toasted ravioli offers a crispy exterior that contrasts perfectly with the creamy cheese filling. Often served with marinara sauce for dipping, this savory treat has become a favorite appetizer in many households. The combination of textures and flavors will have your taste buds dancing, making it a perfect dish for gatherings or just a cozy night in. How do you make Toasted Ravioli from scratch? If you’re feeling adventurous, you can make toasted ravioli from scratch! Begin by making fresh pasta dough with flour and eggs, rolling it out until thin. Prepare a cheese filling with ricotta, Parmesan, and spices. Cut the pasta into squares, place a spoonful of filling, and seal them shut. Dip the ravioli in an egg wash and coat with breadcrumbs before baking or frying. Homemade toasted ravioli offers a unique and authentic experience, allowing you to customize flavors to your liking. It may take more time, but your efforts will surely impress family and friends. Can you freeze Toasted Ravioli? Absolutely! Freezing toasted ravioli is a fantastic way to enjoy them later. After breading the ravioli, spread them out on a baking sheet in a single layer and freeze until solid. Once frozen, transfer them to an airtight container or freezer bag. They can be stored in the freezer for up to three months. When you’re ready to indulge, bake them directly from the freezer. Just be prepared for slightly longer cooking times. This method ensures you have
Crispy Potato Skins Loaded with Cheddar and Bacon Recipe

There’s something undeniably comforting about crispy potato skins. The golden, crunchy exterior beckons you, while the rich blend of cheddar cheese and savory bacon bits sings a tantalizing tune of flavor. It’s a dish that dances on your palate, making every bite a little celebration, bringing joy to gatherings and cozy nights alike. Picture this: as you pop one into your mouth, cheese oozes, bacon crisps, and a dollop of sour cream cools the heat just right. It’s pure bliss on a plate. I still remember the first time I made potato skins for a game night with friends. I proudly presented my creation, and it felt like I was unveiling a masterpiece. Their eyes widened, and my heart raced with anticipation as they took their first bites. The joy of sharing this crispy delight cemented my love for home cooking, and every occasion since has been a great excuse to whip up these delightful treats. Perfect for everything from casual hangouts to festive gatherings, they promise to delight any crowd with their irresistible charm. Ingredients for Potato Skins Here’s what you’ll need to make this delicious Potato Skins: 2 large Russet potatoes – These are ideal for potato skins due to their sturdy structure and fluffy interior. Choose larger ones for more room for toppings. 1 cup shredded sharp cheddar cheese – The star of the show, its bold flavor melts beautifully and creates a gooey cheese layer atop the skins. ½ cup cooked bacon bits – Crispy and smoky, they elevate the flavors of the dish, adding crunch and richness with every bite. ½ cup sour cream – Provides a creamy, tangy contrast to the salty toppings and is a must-have for the ultimate indulgence. 2 tablespoons chopped fresh chives – These vibrant green herbs add a fresh oniony taste and a lovely pop of color to your potato skins. 2 tablespoons olive oil – Used for brushing the potato skins to ensure they get that golden crispiness, olive oil enhances flavor and texture. Salt and pepper to taste – A simple seasoning that brings all the flavors together; don’t shy away from generous pinches for that perfect punch. How to Make Potato Skins Follow these simple steps to prepare this delicious Potato Skins: Step 1: Preheat the Oven Start by preheating your oven to 400°F (200°C). This temperature is perfect for roasting the potatoes to fluffy perfection. Step 2: Bake the Potatoes Scrub the russet potatoes under cold water to remove dirt. Place them directly on the oven rack and bake for 45-60 minutes until tender. Let them cool slightly; this makes them easier to handle. Step 3: Scoop Out the Flesh Once the potatoes have cooled down enough to touch, slice each in half lengthwise. Using a spoon, scoop out most of the flesh, leaving a thin layer for structure—don’t be too aggressive; you want those skins to hold their shape! Step 4: Prepare the Skins Brush the insides of the skins with olive oil and season generously with salt and pepper. This golden bath helps achieve that desired crispy texture. Place the skins skin-side up on a baking sheet. Step 5: Bake for Crispiness Bake the skins in the oven for an additional 10-15 minutes until they look crispy and just beg to be filled with toppings. Step 6: Load and Toast Now comes the fun part! Load each crispy skin with shredded cheddar cheese and delicious bacon bits. Return them to the oven for 5-10 minutes or until the cheese is bubbly and golden. Finish with a generous dollop of sour cream and a sprinkle of chopped chives on top. Serve immediately, and watch as your friends and family dive into this crispy goodness. There you have it! Homemade potato skins that bring a crunch with a cheesy finish, perfect for sharing or hoarding all to yourself. Set them out at your next gathering, and prepare for the compliments to roll in. Perfecting Potato Skins Cooking Process To achieve perfectly crispy Potato Skins, start by baking the potatoes until soft. While they cool, prepare your toppings and seasonings. This efficient sequence keeps things moving smoothly and ensures delicious results. Add Your Touch to Potato Skins Customize your Potato Skins with tantalizing alternatives like crumbled blue cheese, spicy jalapeños, or even a dollop of guacamole. The possibilities are endless, allowing you to showcase your creativity! Storing & Reheating Potato Skins Store leftover Potato Skins in an airtight container in the fridge for up to three days. To reheat, place them in a hot oven for about 10 minutes to regain that glorious crispiness. It’s funny how one evening I made these Potato Skins for a casual get-together, and my friends insisted we make them a monthly tradition. They’re that good! FAQs About Potato Skins What are Potato Skins? Potato skins are a delicious and crispy appetizer made by baking hollowed-out potato halves. They are most often filled with tasty ingredients like cheese, bacon, and toppings such as chives or sour cream. This comforting dish provides a delightful crunch and is perfect for sharing at parties or enjoying as a snack. You can customize potato skins with various toppings according to your taste, making them a versatile choice for any occasion. Whether you prefer them loaded or simple, these snacks are sure to satisfy. How do you make Potato Skins crispy? To achieve crispy potato skins, an essential step is to ensure that the potato is fully baked before hollowing it out. Brush the insides with olive oil and season well before placing them skin side up in the oven. Baking them at high heat helps render them crispy. For an extra crunchy texture, return them to the oven after adding the cheese and toppings, allowing them to cook until golden and bubbly. This method ensures each bite is satisfyingly crisp and full of flavor. Can I customize my Potato Skins toppings? Absolutely! One of the best parts about making potato skins is the ability
Irresistible Double Cheese Onion Dip Recipe for Any Occasion

Picture this: a bubbling, cheesy delight emerges from the oven, cloaked in golden goodness, filling your kitchen with warm aromas that tickle your senses. That’s right, I’m talking about the spectacular, the addictive, the absolutely mouthwatering Double Cheese Onion Dip! Serving this dip at your next gathering will surely turn you into the star of the show. Imagine the smiles as guests dive into this creamy indulgence—trust me, you won’t have any leftovers! Whether you’re hosting a cozy game night or celebrating a festive occasion, this savory dip is a must-have. The combination of rich cream cheese, tangy sour cream, and two kinds of cheese elevates it to new flavor heights. This dish not only satisfies cravings but also creates beautiful memories as friends and family unite over a bowl of cheesy goodness. Let’s get ready to become the culinary hero of your kitchen with this irresistible Double Cheese Onion Dip! Ingredients for Double Cheese Onion Dip Here’s what you’ll need to make this delicious Double Cheese Onion Dip: 8 oz cream cheese – Make sure it’s softened to create a smooth dip without any lumps. 1 cup sour cream – Adds a tangy flavor that balances the richness of cheese. 1 cup shredded sharp cheddar cheese – Provides a robust flavor that will steal the show. 1 cup shredded mozzarella cheese – Contributes a delightful stretchiness and creaminess to the dip. 1 medium yellow onion – Sweet, sautéed onions bring depth and sweetness to every bite. 2 tsp garlic powder – A quintessential seasoning that enhances the overall taste and aroma. 2 tbsp olive oil – Perfect for sautéing the onions to a beautiful golden brown. Chives or green onions – For a fresh, colorful garnish that adds a pop of flavor and visual appeal. How to Make Double Cheese Onion Dip Follow these simple steps to prepare this delicious Double Cheese Onion Dip: Step 1: Preheat the Oven Begin by preheating your oven to 350°F (175°C). This will ensure the dip reaches that lovely golden bubbly state. Step 2: Sauté the Onions In a skillet over medium heat, pour in the olive oil and let it warm up. Add the chopped onion and sauté until they turn golden brown, which should take about 5-7 minutes. The aroma will swiftly replace any lingering doubts about your cooking abilities! Step 3: Mix the Cheesy Combination In a mixing bowl, combine the softened cream cheese and sour cream. Mix until you achieve a delightful, creamy texture that would make any dip lover swoon. Next, stir in the sharp cheddar, mozzarella, garlic powder, and the gloriously sautéed onions. Step 4: Transfer and Spread Once mixed, transfer the cheesy concoction into an oven-safe dish. Spread it evenly, making sure every inch is covered with your cheesy mixture, because nobody likes a dip with dry patches. Step 5: Bake to Cheesy Perfection Slide your dish into the oven and let it bake for 25-30 minutes, or until the top is bubbly and golden. Pull it out and take a moment to admire your handiwork – it’s going to be hard to resist diving in immediately! Step 6: Garnish and Serve Before serving, sprinkle some fresh chives or green onions on top for that added flair. This little touch not only looks fabulous but also enhances the flavor experience. Enjoy with tortilla chips, crackers, or even fresh veggies for that extra crunch! Now that you have the secret recipe to the magical Double Cheese Onion Dip, it’s time to unleash your inner chef. This dip brings people together and warms hearts, making it an essential addition to any gathering. Imagine the laughter and chatter around the table, all because of this creamy concoction. So, roll up your sleeves, grab those ingredients, and let the cheesy goodness begin! Perfecting Double Cheese Onion Dip Cooking Process To achieve the best results, start by sautéing the onions until they are beautifully caramelized. While the onions cook, prepare the cheese mixture. This efficient sequence ensures every flavor is perfectly melded, providing an unforgettable dip experience. Add Your Touch to Double Cheese Onion Dip Feel free to swap out the cheeses; gouda adds a smoky twist, or you can use pepper jack for a spicy kick. Add in cooked bacon bits or jalapeños for added excitement—personalize it to your taste! Storing & Reheating Double Cheese Onion Dip Store any leftovers in an airtight container in the fridge for up to three days. To reheat, simply warm it in the oven at 350°F until bubbly, or microwave in short bursts, stirring in between. You won’t believe the sheer joy I felt the first time I served Double Cheese Onion Dip at a game night. My friends dove in like it was the last dip on Earth, and their empty plates were the best compliment I could ask for! FAQs About Double Cheese Onion Dip What is Double Cheese Onion Dip? Double Cheese Onion Dip is a creamy and flavorful appetizer that combines sharp cheddar and mozzarella cheeses, along with sautéed onions and garlic. It’s a delightful mixture that’s baked until bubbly and golden, making it perfect for parties, game nights, or any gathering. The rich, cheesy goodness is complemented by the sweet, caramelized onions, creating a mouth-watering dip that’s sure to be a hit at your next event. How can I customize my Double Cheese Onion Dip? One of the best aspects of Double Cheese Onion Dip is its versatility. You can easily swap out the cheeses to suit your palate—try adding gouda for a smoky flavor or pepper jack for some heat! For added texture and flavor, consider incorporating ingredients like crispy bacon bits, sautéed mushrooms, or even fresh jalapeños. This recipe allows you to be creative, so feel free to experiment and make it your own! What do I serve with Double Cheese Onion Dip? Double Cheese Onion Dip pairs wonderfully with a variety of dippers. Classic choices like tortilla chips or sliced baguette are always crowd-pleasers. Fresh
Delicious Honey Lemon Pepper Wings Recipe for a Perfect Dinner

Honey Lemon Pepper Wings offer a flavor experience that’s both tangy and sweet, perfectly balancing the zest of lemon with the rich sweetness of honey and the subtle kick of freshly cracked pepper. Imagine biting into a crispy, golden wing, first savoring the glossy honey glaze before the citrus notes dance over your palate, while the pepper gives that delightful, spicy undertone. Whether it’s game day, a backyard barbecue, or simply a cozy dinner at home, these wings have a way of making any occasion feel special. You’ll find yourself sneaking a wing from the platter before they even hit the table — trust me, I can’t resist either! In my household, wings have always been a crowd-pleaser. I remember the first time I made Honey Lemon Pepper Wings for my family. The aroma filled the kitchen, causing a stampede to the dinner table like kids on Christmas morning! Every bite was met with cheers and requests for more. This dish is more than just food; it’s a memory factory, ready to create your own delicious moments. Each batch is a testament to flavor, and I promise it will become a staple in your culinary repertoire, transforming your weeknight dinners into something extraordinary. Ingredients for Honey Lemon Pepper Wings Here’s what you’ll need to make this delicious Honey Lemon Pepper Wings: 2 pounds fresh chicken wings – Look for wings that are plump and meaty for the best flavor. 1/2 cup pure honey – Use high-quality honey for a rich sweetness that enhances the dish’s flavor profile. 2 tablespoons fresh lemon juice – Freshly squeezed juice brings a brightness that bottled juice just can’t match. 1 tablespoon lemon zest – The zest adds concentrated flavor and aromatic oils to the wings. 1 teaspoon freshly cracked black pepper – Freshly cracked pepper elevates the spice level, giving a pleasant kick. 1 teaspoon garlic powder – Adds depth of flavor; you can substitute with fresh minced garlic if preferred. 2 tablespoons low-sodium soy sauce – This brings a savory umami element to balance the sweetness. Salt to taste – Adjust according to your preferences; remember that the soy sauce already adds saltiness. How to Make Honey Lemon Pepper Wings Follow these simple steps to prepare this delicious Honey Lemon Pepper Wings: Step 1: Preheat the Oven Preheat oven to 400°F (200°C) and line a baking sheet with aluminum foil for easy cleanup. Step 2: Season the Wings In a large bowl, season chicken wings with salt, garlic powder, and freshly cracked black pepper. Make sure they are evenly coated for maximum flavor. Step 3: Prepare the Sauce In another bowl, whisk together pure honey, low-sodium soy sauce, fresh lemon juice, and lemon zest until well combined. Step 4: Coat the Wings Toss half of the sauce mixture with the seasoned wings until they’re evenly coated, making sure every wing gets that delicious glaze. Step 5: Bake the Wings Arrange the wings on the prepared baking sheet in a single layer. Bake for about 40-45 minutes, flipping them halfway through for even cooking and that perfect crispy skin. Step 6: Final Touches After removing the wings from the oven, drizzle the remaining sauce over the wings for a last-minute burst of flavor. Serve them hot for the best experience! Transfer to plates and enjoy your wings bursting with flavor, while your friends and family marvel at your culinary genius! Perfecting Honey Lemon Pepper Wings Cooking Process To achieve perfect Honey Lemon Pepper Wings, start by preheating your oven and prepping your ingredients. Season the wings, mix the sauce, and let them marinate while the oven warms up. Baking them in a single layer helps ensure even cooking and glorious crispiness. Add Your Touch to Honey Lemon Pepper Wings Feel free to customize the Honey Lemon Pepper Wings by adding spices like cayenne for heat or swapping honey with maple syrup for a different sweetness. Throw in some fresh herbs like thyme or rosemary for an extra flavor kick, or add a touch of sriracha for those who love a spicy twist. Storing & Reheating Honey Lemon Pepper Wings Store any leftover Honey Lemon Pepper Wings in an airtight container in the fridge for up to three days. To reheat, pop them back in the oven at 350°F (175°C) for about 10-15 minutes until warmed through and crispy again. It was a chilly evening when I decided to whip up these Honey Lemon Pepper Wings for a gathering with friends. The ecstatic chorus of “Wow, this is incredible!” echoed in my ears and warmed my heart, reminding me of the magic of sharing delicious food with loved ones. FAQs About Honey Lemon Pepper Wings What is Honey Lemon Pepper Wings? Honey Lemon Pepper Wings are a delightful twist on traditional chicken wings, combining the sweetness of honey and the refreshing tang of lemon with a hint of peppery zest. This easy-to-make dish features crispy chicken wings coated in a luscious sauce that is both savory and slightly sweet. Ideal for parties, game days, or simple family dinners, these wings are sure to impress your guests and tantalize their taste buds. How do I make Honey Lemon Pepper Wings crispy? To achieve that perfect crispy skin on your Honey Lemon Pepper Wings, ensure that you bake them in a single layer on a lined baking sheet. Preheating the oven to 400°F (200°C) is crucial, allowing the wings to start cooking immediately and develop a crunchy exterior. Flipping them halfway through the cooking time also helps to achieve that desired crispiness, so don’t skip this step! Can I prepare Honey Lemon Pepper Wings in advance? Absolutely! One of the great things about Honey Lemon Pepper Wings is how well they can be prepared in advance. You can season the wings and toss them in the sauce ahead of time, then cover and refrigerate them for a few hours or even overnight. When you’re ready to serve, simply bake them as directed, and they’ll taste just