
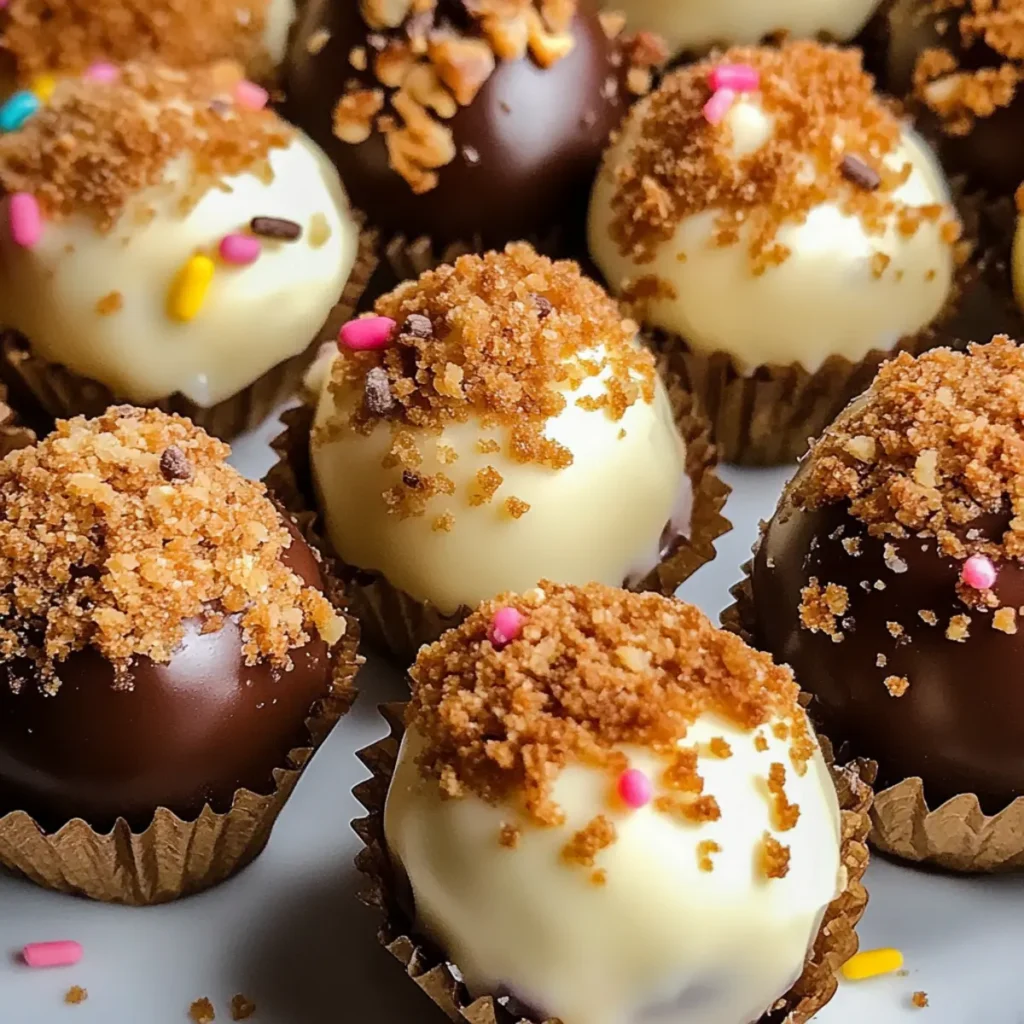
Indulging in a delectable dessert doesn’t always require hours in the kitchen. Enter cheesecake balls—a delightful bite-sized treat that packs all the creamy, tangy goodness of classic cheesecake, all while being as easy as pie to whip up! With a burst of chocolaty goodness coating every sweet ball, your taste buds are in for a treat as the graham cracker crunch compliments the rich creaminess like a dream.
Picture this: a gathering with friends, laughter filling the air, and a platter of these irresistible cheesecake balls stealing the show. Whether you’re enjoying them at a holiday celebration or a cozy movie night, these little gems are perfect for any occasion. Trust me; once you try them, you’ll be dreaming about those creamy bites for days.
Why You'll Love This Cheesecake Balls
- This incredible Cheesecake Balls transforms simple everyday ingredients into restaurant-quality flavors that will blow your mind completely.
- Foolproof recipe techniques guarantee perfect results every single time, making even novice cooks feel like professional chefs instantly.
- Stunning visual appeal with gorgeous colors and mouthwatering aromas creates the ultimate Instagram-worthy dish for any special occasion.
- Endlessly adaptable for different dietary needs while working beautifully for meal prep, date nights, or entertaining large groups effortlessly.
Ingredients for Cheesecake Balls
Here’s what you’ll need to make this delicious Cheesecake Balls:
8 oz cream cheese – Ensure it’s softened for easy mixing. You can choose low-fat or full-fat versions depending on your preference.
1/2 cup powdered sugar – This adds sweetness and gives that classic cheesecake flavor. Make sure it’s sifted to avoid lumps.
1 tsp vanilla extract – Pure vanilla extract enhances the flavor beautifully. Never settle for imitation vanilla; your taste buds will thank you.
1 cup graham cracker crumbs – These give that delightful crunch and are essential for the cheesecake flavor; crush them yourself for freshness, or buy pre-made.
1 cup chocolate chips – You can use semi-sweet for a classic taste or dark chocolate for a richer experience.
How to Make Cheesecake Balls
Follow these simple steps to prepare this delicious Cheesecake Balls:
Step 1: Soften the Cream Cheese
Allow the cream cheese to sit at room temperature for about 15 minutes. Softened cream cheese is crucial for achieving that velvety texture.
Step 2: Mix Ingredients
In a large mixing bowl, combine the softened cream cheese, powdered sugar, and vanilla extract. Mix with a hand mixer or a spatula until you achieve a smooth and creamy consistency.
Step 3: Add Graham Cracker Crumbs
Gently fold in the graham cracker crumbs. You want everything well combined, but take care not to overmix, as this could deflate the creaminess.
Step 4: Form the Balls
Using a tablespoon or a small cookie scoop, take portions of the mixture and roll them into balls. Place the formed balls on a parchment-lined baking sheet.
Step 5: Chill the Balls
Cover the baking sheet with plastic wrap and chill the balls in the refrigerator for about one hour. This helps them firm up, making them easier to dip in chocolate.
Step 6: Dip in Chocolate
Melt the chocolate chips in the microwave in short intervals, stirring between bursts to ensure smooth melting. Once melted, dip each chilled cheesecake ball into the chocolate, fully coating them. Return the chocolate-covered balls to the lined baking sheet to set.
Serve these delightful cheesecake balls chilled and watch as they disappear in no time, leaving your guests clamoring for the recipe! Enjoy them as a sweet ending to an evening or as an enticing treat during the day. You’ll appreciate their versatility and how effortlessly they elevate any occasion.
Get ready to impress with these simple yet luxurious cheesecake balls that combine the rich flavors of cheesecake with the simplicity of homemade treats. Sweet, tangy, and dipped in chocolate, they are sure to become a staple in your dessert repertoire. Happy baking!
You Must Know About Cheesecake Balls
- This showstopping Cheesecake Balls delivers restaurant-quality results using simple ingredients you probably already have at home.
- The perfect balance of textures and flavors creates an unforgettable dining experience that will have everyone asking for seconds.
- Picture-perfect presentation with vibrant colors makes this dish absolutely Instagram-worthy and guaranteed to impress any dinner guest.
- Incredibly versatile recipe that works beautifully for weeknight dinners, meal prep, special occasions, or even outdoor entertaining sessions.
Perfecting Cheesecake Balls Cooking Process
To achieve the perfect Cheesecake Balls, start by softening cream cheese at room temperature. While that’s happening, gather all your ingredients and prepare a work area for seamless assembly. This ensures all elements come together smoothly without a hitch.
Add Your Touch to Cheesecake Balls
Feel free to personalize your Cheesecake Balls by adding crushed nuts, dried fruits, or a splash of lemon juice for zest. You can also swap chocolate chips for white chocolate or butterscotch chips, offering endless flavor combinations for any palate.
Storing & Reheating Cheesecake Balls
Store your Cheesecake Balls in an airtight container in the refrigerator. They can last up to a week. If you need to reheat, I recommend letting them sit at room temperature for a few minutes to soften, but they’re best enjoyed cold.
Chef's Helpful Tips for Cheesecake Balls
- This professional-quality Cheesecake Balls relies on precise timing and temperature control to achieve restaurant-standard results consistently.
- Master the art of mise en place by prepping all ingredients beforehand, ensuring smooth execution and preventing any last-minute cooking disasters.
- The secret lies in layering flavors throughout the cooking process rather than seasoning only at the end for maximum depth.
- Pro tip: let the finished dish rest for optimal texture and flavor development before serving to hungry guests waiting eagerly.
It was during a family gathering when I first served these beautiful Cheesecake Balls. The delighted squeals of my nieces as they devoured each one reminded me that sometimes the simplest treats can create the happiest memories.
FAQs About Cheesecake Balls
What is Cheesecake Balls?
Cheesecake Balls are delightful bite-sized treats made from softened cream cheese, powdered sugar, and graham cracker crumbs, all rolled into small balls and dipped in melted chocolate. They capture the rich, creamy flavor of traditional cheesecake but are served in a fun, portable form. Perfect for parties or a sweet snack, these little beauties combine a crunchy exterior with a smooth, luscious interior. Their easy preparation method means you can whip them up in no time, making them a favorite among dessert lovers of all ages.
How do I store Cheesecake Balls?
To keep your Cheesecake Balls fresh and delicious, place them in an airtight container and store them in the refrigerator. They will stay good for up to one week, which makes them ideal for meal prep or a make-ahead dessert. If you want to enjoy them at their best, serve them cold straight from the fridge; simply let them sit at room temperature for a few minutes if they seem too firm. Remember, these treats taste amazing chilled!
Can I customize my Cheesecake Balls?
Absolutely! One of the best parts about making Cheesecake Balls is how versatile they are. You can add crushed nuts for a delightful crunch, or even mix in your favorite candies for a flavor twist. Consider using flavored extracts instead of vanilla, like almond or lemon, to create unique variations. You can also swap the chocolate coating for white chocolate or colored candy melts for an extra pop. Let your creativity run wild!
Are Cheesecake Balls gluten-free?
Traditional Cheesecake Balls are not gluten-free due to graham cracker crumbs, which usually contain wheat. However, you can easily convert this dessert into a gluten-free treat by using gluten-free graham crackers or a similar crust alternative. Just ensure all your ingredients are certified gluten-free. This way, everyone can indulge in the creamy goodness of Cheesecake Balls without worry!
Conclusion for Cheesecake Balls
In summary, Cheesecake Balls are an easy and delightful dessert option that brings together the rich flavors of cheesecake with the fun of a small treat. From their straightforward preparation to the endless customization possibilities, they are perfect for any occasion—whether it’s a casual family gathering or a fancy dinner party. Don’t forget to experiment with your favorite add-ins and share these crowd-pleasers with friends and family. Enjoy the sweet rewards of your handiwork with these irresistible Cheesecake Balls!

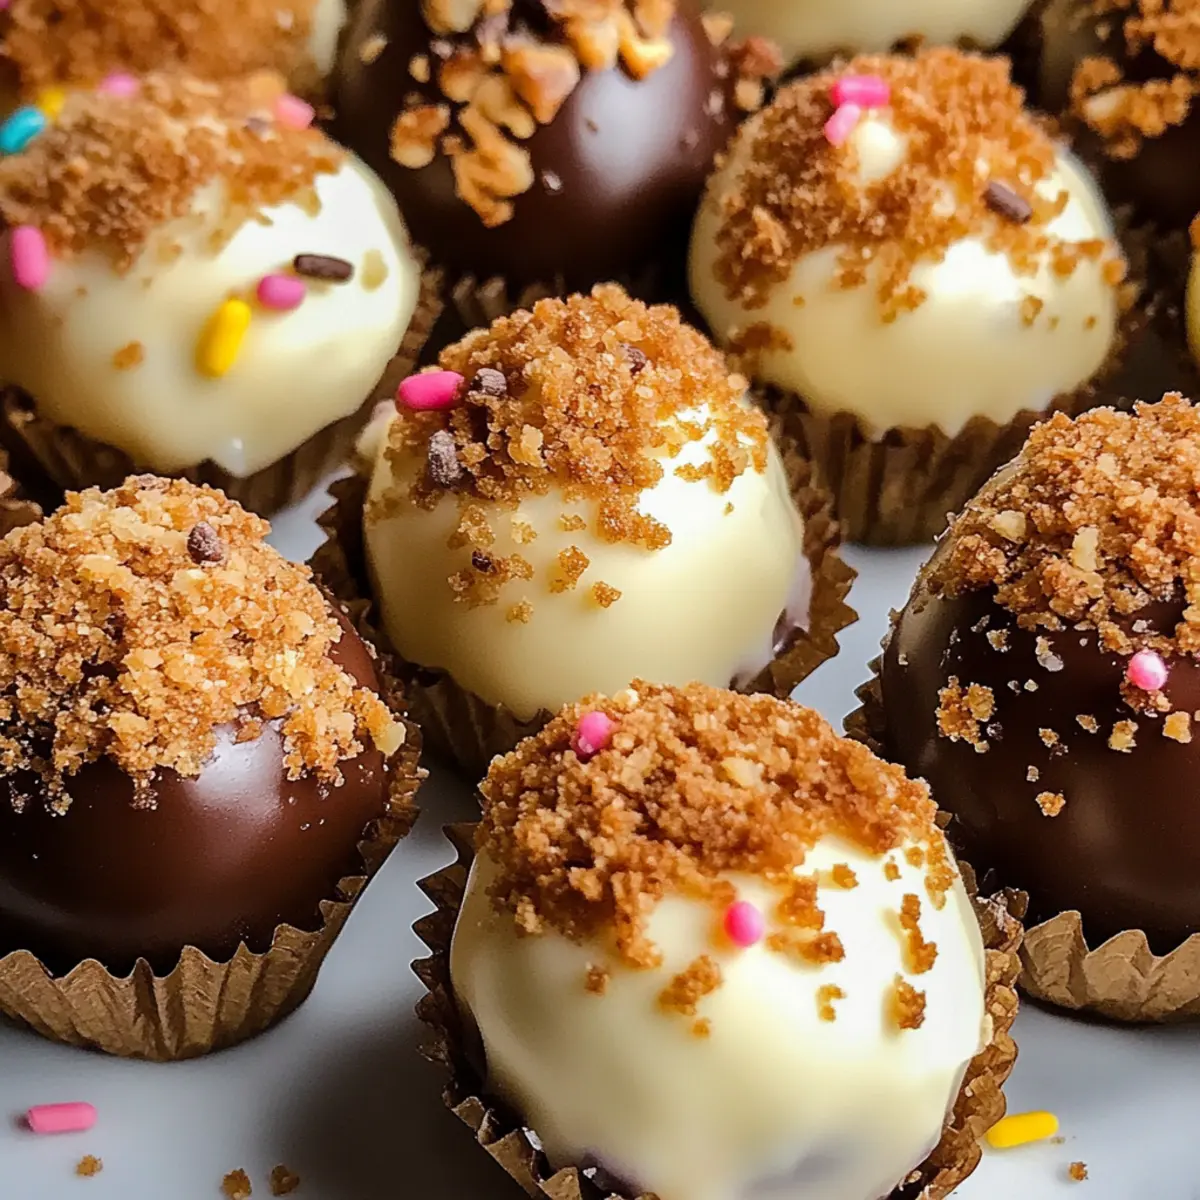
Irresistible Cheesecake Balls
Ingredients
Equipment
Method
- Begin by softening the cream cheese at room temperature.
- In a large bowl, mix the softened cream cheese, powdered sugar, and vanilla extract until smooth.
- Gently fold in the graham cracker crumbs until well combined.
- Scoop tablespoon-sized portions and roll them into balls.
- Chill the balls on a parchment-lined baking sheet for about one hour.
- Melt the chocolate chips in the microwave; dip each ball into the melted chocolate and place back on the sheet to set.