
Classic Southern Sweet Potato Pie: Grandma\’s Holiday Recipe
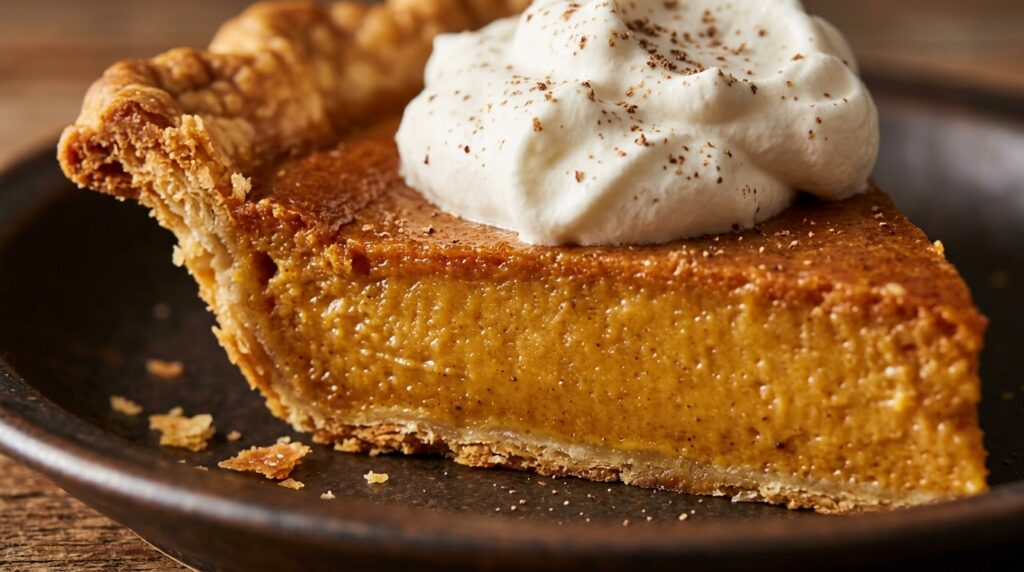
No Southern Thanksgiving or holiday dinner table is complete without a slice of authentic Classic Southern Sweet Potato Pie. Boasting a silky, velvety custard filling crafted from oven-roasted sweet potatoes, rich creamery butter, evaporated milk, and warm aromatic freshly grated nutmeg, all baked inside a flaky, golden butter crust, this heirloom recipe outshines pumpkin pie every single time. Light, luscious, and deeply comforting, it is a timeless family treasure that delivers pure nostalgic bliss from the first bite to the very last crumb! While pumpkin pie often relies on heavy spice blends to compensate for mild squash flavor, sweet potato pie celebrates the naturally sweet, caramelized earthiness of the roasted tuber itself. Roasting the sweet potatoes in their jackets caramelizes their natural sugars, intensifying their depth while driving off excess moisture that can lead to a soggy crust. When pureed with real butter and rich evaporated milk, the texture becomes impossibly light, creamy, and cloud-like, elevated by the signature perfumed warmth of freshly grated whole nutmeg. Why You’ll Love This Recipe Superior Flavor & Silkier Texture: Sweeter, richer, and noticeably silkier than traditional canned pumpkin pie. Grandma’s Tested Ratio: Perfectly balanced sweetness with brown sugar, vanilla, and fresh nutmeg that never overpowers the sweet potatoes. Foolproof Make-Ahead Dessert: This pie sets up beautifully overnight, making it ideal for stress-free holiday meal prep. Iconic Holiday Showstopper: The warm golden-orange hue and delicate custard crumb look stunning topped with swirls of homemade chantilly cream. Key Ingredients & Smart Swaps Roasted sweet potatoes, butter, evaporated milk, eggs, and freshly grated nutmeg on a quartz workstation. Fresh Sweet Potatoes: Beauregard or Jewel sweet potatoes roasted whole in the oven offer maximum sweetness and concentrated flavor. Avoid canned sweet potato puree or boiled yams, which retain too much water. Unsalted Butter: Blended directly into the hot mashed potatoes while beating to create an ultra-smooth, emulsion-like custard. Evaporated Milk: The Southern baker’s secret weapon! Evaporated milk has 60% of water removed, providing creamy richness without watering down the custard. Freshly Grated Nutmeg: Fresh whole nutmeg grated on a microplane is essential; its floral, fragrant aroma gives sweet potato pie its unmistakable Southern identity. Deep-Dish Pie Crust: A flaky all-butter homemade crust or high-quality refrigerated crust blind-pricked to prevent puffing. Step-by-Step Baking Walkthrough 1. Roast the Sweet Potatoes: Roast whole sweet potatoes at 400°F (200°C) for 50 to 60 minutes until soft and caramelized. Peel away skins and measure 2 cups of warm flesh. 2. Puree with Butter: In a mixing bowl, beat sweet potatoes and softened butter on medium speed for 2 minutes until glossy and smooth, naturally removing any fibrous strands. Pouring silky spiced sweet potato custard batter into a crimped pastry crust before sliding into the oven. 3. Whisk the Custard: Lower oven to 350°F (175°C). Beat in both sugars, evaporated milk, eggs, vanilla, cinnamon, fresh nutmeg, ginger, and salt until completely uniform. 4. Bake to a Gentle Jiggle: Pour into unbaked pie shell. Bake at 350°F for 50 to 55 minutes until edges are set and center gently jiggles. Cool completely on a wire rack for 3 hours before slicing. 3 Chef Secrets for Perfect Results 1. Always Roast, Never Boil: Boiling sweet potatoes in water dilutes their flavor and makes the custard soggy and prone to cracking. Roasting caramelizes their natural sugars and keeps the batter thick and concentrated. 2. Beat with an Electric Mixer to Remove Fibers: Rather than hand-mashing with a fork, beating the warm roasted flesh with an electric mixer effortlessly catches and breaks down any stringy fibers against the beaters, guaranteeing a mirror-smooth texture. 3. Do Not Overbake: Pull the pie from the oven when the outer edges are puffed and set, but the center 2 inches still has a slight, gelatinous jiggle. The residual heat will finish setting the custard perfectly as it cools, preventing unsightly surface cracks. What to Serve With Sweet Potato Pie Served holiday-style with a generous swirl of fresh vanilla bean whipped cream and grated nutmeg. Toppings & Creams: Freshly whipped vanilla bean chantilly cream, maple bourbon whipped cream, or a scoop of butter pecan ice cream. Holiday Spread Favorites: Serve alongside roast turkey, cornbread dressing, candied yams, and cranberry sauce as the crowning grand finale of your Thanksgiving feast. Cozy Sips: Hot spiced chicory coffee, bourbon-spiked apple cider, or a rich cup of Southern sweet tea. Storage, Freezing & Reheating Instructions Refrigeration: Because sweet potato pie is an egg-and-milk custard, store covered loosely with foil or plastic wrap in the refrigerator for up to 4 to 5 days. Serve slightly chilled or at room temperature. Freezing: Baked sweet potato pie freezes exceptionally well! Once completely cooled, wrap the entire pie in plastic wrap followed by heavy-duty aluminum foil. Freeze for up to 3 months. Thaw overnight in the refrigerator before serving. Serving Temperature: While delicious chilled, Southern tradition often favors serving slices at room temperature or gently warmed in a 300°F oven for 8 minutes to awaken the spices. Frequently Asked Questions What is the difference between sweet potato pie and pumpkin pie?Sweet potato pie has a lighter, fluffier, and silkier texture with a naturally sweeter, more complex potato flavor highlighted by nutmeg and vanilla, whereas pumpkin pie is denser and spiced heavily with cloves and allspice. Can I make this pie a day in advance?Yes! In fact, sweet potato pie actually tastes better the second day after the warm spices and brown butter flavors have had time to fully marry in the refrigerator. Can I blind bake the crust first?A standard unbaked crust bakes beautifully with this custard. However, if you prefer an extra-crispy bottom crust, you can partially blind-bake the crust for 10 minutes with pie weights at 375°F before adding the filling. Pin This Recipe for Later Love this heirloom holiday classic? Save this pin to your Pinterest Thanksgiving baking board so you have Grandma’s sweet potato pie ready to bake all season!
Creamy Garlic Parmesan Sausage and Gnocchi: Easy 20-Min Skillet Dinner
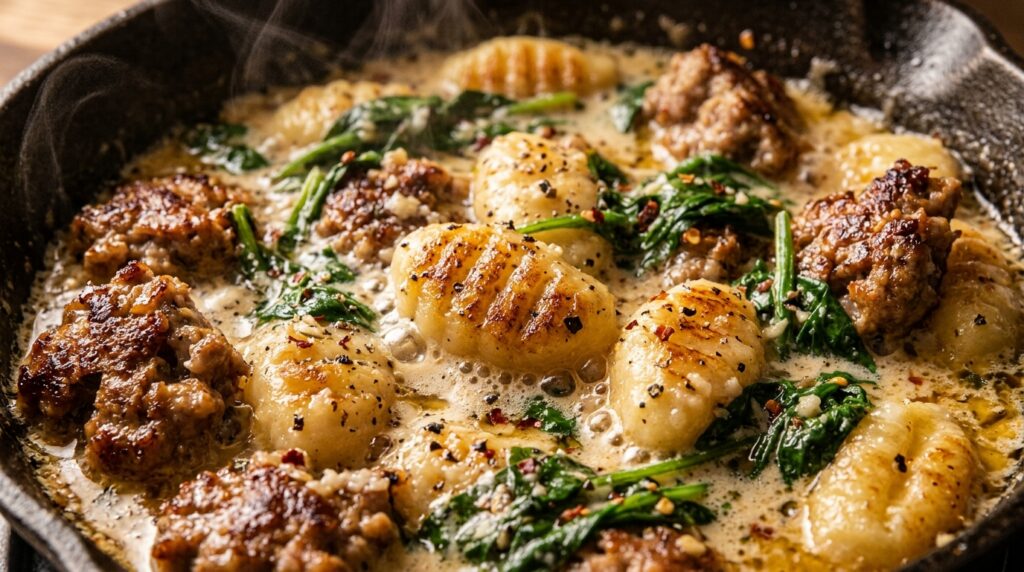
When you need a comforting, restaurant-quality meal on the table in record time, nothing beats this Creamy Garlic Parmesan Sausage and Gnocchi Skillet. Packed with savory browned Italian sausage crumbles, pillowy potato gnocchi, and tender wilted baby spinach swimming in a rich, velvety garlic parmesan cream sauce, this foolproof one-pan dinner is ready in just 20 minutes. Best of all, there is no need to boil a separate pot of water—the gnocchi cook directly in the flavorful simmering sauce, soaking up maximum flavor while keeping cleanup down to a single pan! The culinary magic of cooking gnocchi directly in the skillet comes from the natural starches released by the potato dumplings as they simmer. Instead of losing those starches down the drain in a pasta pot, they emulsify directly into the chicken broth, savory sausage drippings, and heavy cream. When combined with aged Parmigiano-Reggiano, the resulting sauce transforms into a glossy, luxuriant coating that hugs every single curve of the tender gnocchi. With a whisper of red pepper heat and fresh green spinach to cut through the richness, it’s an impeccably balanced weeknight triumph. Why You’ll Love This Recipe 20-Minute Weeknight Speed: From raw sausage to piping-hot dinner bowls in just 20 minutes flat. Truly One Single Skillet: The gnocchi simmer right in the sauce—no extra pots, no colanders, and practically zero cleanup. Pillowy Soft Texture: Simmering gnocchi in savory broth yields tender, melt-in-your-mouth dumplings that never turn gummy or waterlogged. High-End Italian Trattoria Flavor: Combines savory fennel sausage, roasted garlic aroma, and nutty parmesan cream for pure restaurant indulgence at home. Key Ingredients & Smart Swaps Fresh Italian sausage, potato gnocchi, spinach, heavy cream, and parmesan arranged on a quartz workstation. Potato Gnocchi: Use standard shelf-stable or vacuum-packed refrigerated potato gnocchi. Do not pre-boil them! Frozen gnocchi can also be used; simply add 2 extra minutes of covered simmer time. Italian Sausage: Mild sweet Italian pork sausage provides classic fennel and herb seasoning. For a spicy kick, swap for hot Italian sausage or spicy chicken andouille. Fresh Baby Spinach: Tender baby spinach wilts effortlessly into the hot sauce, lending vibrant color, freshness, and essential vitamins. Heavy Whipping Cream: Creates a silky, stable sauce that will not curdle when heated. For a lighter profile, half-and-half can be substituted with an extra pinch of parmesan for thickness. Parmigiano-Reggiano: Freshly grated aged parmesan melts seamlessly into the cream sauce, imparting salty, nutty umami depth. Step-by-Step Cooking Walkthrough 1. Brown the Sausage & Aromatics: In a large 12-inch skillet over medium-high heat, brown the ground Italian sausage and diced onion for 5 to 6 minutes, breaking the meat into small crumbles. Stir in minced garlic and red pepper flakes during the final minute. 2. Add Liquids & Gnocchi: Pour in the chicken broth and heavy cream, deglazing the flavorful pan drippings. Scatter uncooked gnocchi into the liquid in an even layer. Stirring tender potato gnocchi and fresh spinach into the bubbling garlic parmesan cream on active heat. 3. Simmer Covered: Bring liquid to a simmer, cover with a lid, and cook for 4 to 5 minutes until gnocchi are tender and pillowy soft. 4. Melt Parmesan & Wilt Greens: Remove the lid, reduce heat to low, and stir in freshly grated parmesan cheese until silky and smooth. Fold in fresh baby spinach until wilted. Garnish with fresh herbs and serve hot! 3 Chef Secrets for Perfect Results 1. Never Pre-Boil the Gnocchi: Boiling gnocchi in water first makes them overly soggy and waterlogged. Simmering them uncooked directly in the broth and cream allows the potato dumplings to absorb rich seasoning while keeping their plump, delicate bite. 2. Keep the Skillet Covered During Simmering: Covering the skillet traps steam, ensuring that the gnocchi cook through uniformly from all sides without the sauce evaporating prematurely. If the sauce thickens too fast, simply add a splash of chicken broth. 3. Grate Your Own Parmesan Cheese: Pre-shredded cheese contains anti-caking starches that cause sauces to clump and separate. Freshly grated Parmigiano-Reggiano dissolves instantly into a velvet-smooth, luxurious sauce. What to Serve With Sausage and Gnocchi Served restaurant-style in an artisan bowl with shaved parmesan, fresh basil, and crusty garlic bread. Crusty Artisan Breads: Warm roasted garlic ciabatta, toasted garlic bread, or rosemary focaccia for dipping into the decadent parmesan cream sauce. Crisp Italian Salads: A refreshing Caesar salad with crunchy croutons, a shaved fennel and citrus salad, or mixed greens tossed in lemon herb vinaigrette. Wine Pairings: A crisp, medium-bodied Italian white such as Pinot Grigio, Vermentino, or a bright Chianti Classico cuts through the rich cream sauce exquisitely. Storage, Freezing & Reheating Instructions Refrigeration: Allow leftovers to cool completely. Store in an airtight container in the refrigerator for up to 4 days. Gentle Stovetop Reheating: Reheat leftovers gently in a skillet over low heat with a splash of chicken broth or cream to loosen the sauce and revive its velvety creaminess. Microwave Method: Heat single servings at 50% power in 45-second intervals, stirring between bursts to prevent separation. Freezing: Because potato gnocchi can soften and dairy cream sauces can separate upon thawing, freezing is not recommended for this recipe. Enjoy fresh for the best texture! Frequently Asked Questions Can I use cauliflower gnocchi for this recipe?Yes! If using frozen Trader Joe’s cauliflower gnocchi, pan-sear them first in olive oil for 4 minutes to develop a slight crust before adding the broth and cream so they don’t become mushy. Can I use ground turkey sausage instead of pork?Absolutely. Ground Italian turkey sausage or chicken sausage makes a delicious, lean alternative with equally fantastic savory flavor. Can I add other vegetables?Yes! Sliced cremini mushrooms, sun-dried tomatoes, or diced zucchini can be sautéed right along with the onions and sausage for extra veggie goodness. Pin This Recipe for Later Love this cozy one-pan dinner? Save this pin to your Pinterest dinner board so you have the ultimate 20-minute weeknight meal ready whenever you need it!
Copycat Starbucks Cranberry Bliss Bars: Easy Holiday Recipe
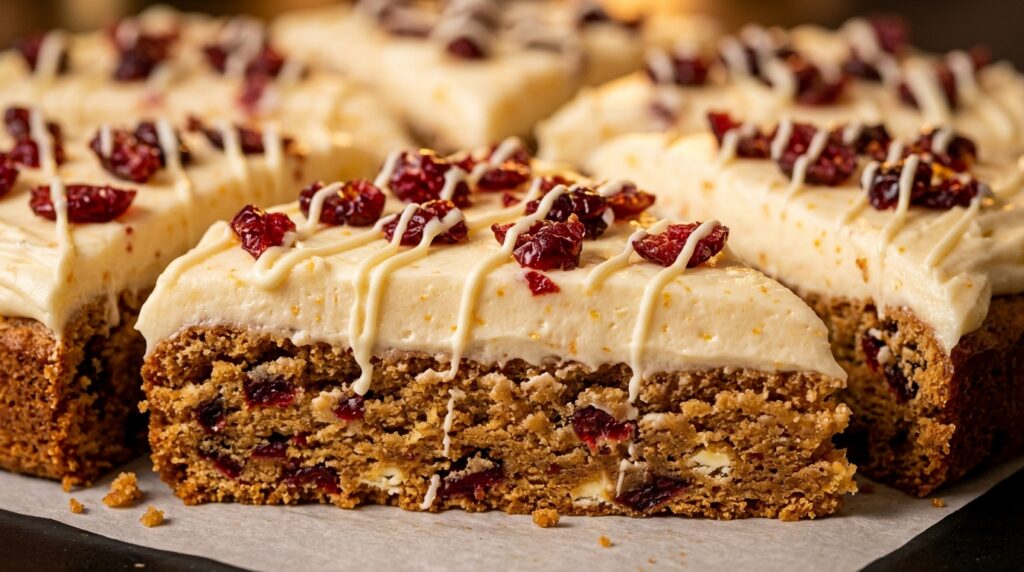
Every holiday season, millions eagerly await the return of Starbucks’ most beloved seasonal pastry case treat, but these homemade Copycat Starbucks Cranberry Bliss Bars are even richer, fresher, and incomparably more delicious! Featuring an ultra-chewy brown butter blondie base spiced with warm ground ginger, studded with pockets of sweet white chocolate chips and ruby red dried cranberries, and crowned with a thick layer of citrusy orange cream cheese frosting, this showstopping holiday bar delivers bakery perfection straight from your home oven. Whether you are hosting a festive holiday party or packaging treats for a cookie exchange, these iconic triangle bars are guaranteed to steal the spotlight! The culinary genius behind the Cranberry Bliss Bar lies in its masterful interplay of warm spices and bright holiday acidity. Ground ginger woven throughout the dense blondie batter cuts through the rich sweetness of melted butter and brown sugar, providing subtle warmth without tasting overtly like a gingerbread cookie. Meanwhile, fresh orange zest infused directly into both the blondie batter and the whipped cream cheese frosting creates an invigorating citrus perfume that perfectly complements the tart, chewy dried cranberries. Finished with a decorative zigzag of glossy melted white chocolate, every bite balances creamy, chewy, and tangy notes in pure holiday bliss. Why You’ll Love This Recipe Better Than the Coffee Shop: Made with pure cream cheese, real butter, and fresh orange zest—tasting noticeably fresher and less artificial than store-bought. Effortless Sheet-Pan Baking: No scooping individual cookies or fiddling with complex layers; simply bake one sheet, frost, drizzle, and slice. The Ultimate Make-Ahead Dessert: These bars taste even better after chilling overnight as the flavors marry and the chewy texture deepens. Stunning Holiday Presentation: The contrast of snow-white frosting, bright red cranberries, and diagonal white chocolate drizzles looks magnificent on any Christmas dessert platter. Key Ingredients & Smart Swaps Tart cranberries, white chocolate chips, cream cheese, and fresh citrus arranged on a quartz baking station. Sweetened Dried Cranberries (Craisins): Provides vibrant ruby jewel color and tangy chewiness. Roughly chopping them ensures an even distribution in every single bite. White Chocolate Chips: High-quality white chocolate chips (such as Ghirardelli or Guittard) melt smoothly into the blondie batter and create a velvety decorative drizzle on top. Ground Ginger: The secret copycat ingredient! Just 1 1/2 teaspoons gives the blondie base its authentic Starbucks warmth without overpowering the vanilla notes. Fresh Orange Zest & Juice: Infuses essential citrus brightness into both the batter and the cream cheese frosting, lifting the sweetness. Brick-Style Cream Cheese: Always use full-fat block cream cheese rather than tub spreads, which contain excess water and will make your frosting runny. Step-by-Step Baking Walkthrough 1. Prepare the Pan & Batter: Line a 9×13 metal baking pan with parchment paper. Whisk melted butter, brown sugar, and white sugar until glossy. Whisk in eggs, vanilla extract, and orange zest. Gently fold in flour, ginger, baking powder, and salt, followed by white chocolate chips and chopped cranberries. 2. Bake to Chewy Perfection: Spread batter evenly into the prepared pan. Bake at 350°F (175°C) for 18 to 22 minutes until edges are lightly golden and a toothpick inserted in the center comes out clean with a few moist crumbs. Do not overbake! Cool completely on a wire rack. Spreading cloud-like orange cream cheese frosting evenly over the golden blondie base before garnishing. 3. Whip the Citrus Frosting: In a stand mixer, beat softened cream cheese and butter until smooth. Gradually beat in powdered sugar, orange zest, orange juice, and vanilla until thick and velvety smooth. 4. Frost, Garnish & Chill: Smooth the frosting generously over the cooled blondies. Sprinkle with chopped dried cranberries. Melt white chocolate with a touch of oil, transfer to a piping bag or ziplock bag with the corner snipped, and drizzle diagonally over top. Chill for 1 hour to set frosting before slicing. 3 Chef Secrets for Perfect Results 1. Cool the Blondie Slab Completely Before Frosting: If the blondie base retains even slight warmth, the butter and cream cheese in the frosting will melt and slide right off. For the cleanest results, let the pan cool to room temperature, then pop it in the fridge for 20 minutes before applying frosting. 2. Add Coconut Oil to Your White Chocolate Drizzle: White chocolate burns easily and tends to seize or harden into brittle chunks when drizzled. Adding 1/2 teaspoon of vegetable or coconut oil keeps the melted chocolate glossy and fluid, allowing it to slice smoothly without cracking the bars. 3. Use a Warm, Clean Chef’s Knife for Triangle Slices: To get authentic Starbucks bakery triangles, slice the chilled slab into 4 long rectangles, cut each rectangle into squares, and then slice diagonally across each square. Wipe the blade clean with a warm, damp towel between cuts for razor-sharp edges. What to Serve With Cranberry Bliss Bars Artfully plated holiday triangles served with fresh mint, orange curls, and piping hot coffee. Warm Cozy Beverages: Pair with a steaming mug of dark roast coffee, a Starbucks copycat peppermint mocha, hot spiced chai latte, or cinnamon spiced apple cider. Holiday Dessert Boards: Display alongside holiday gingerbread men, soft molasses cookies, peppermint bark, and chocolate crinkle cookies for an unforgettable Christmas cookie tray. Festive Wine Pairings: Serve with a chilled glass of Prosecco, Moscato d’Asti, or a delicate sparkling rosé to accentuate the bright cranberry notes. Storage, Freezing & Reheating Instructions Refrigeration: Because of the fresh cream cheese frosting, store Cranberry Bliss Bars in an airtight container in the refrigerator for up to 5 to 7 days. Serve chilled or bring to room temperature 15 minutes before serving for maximum softness. Freezing: These bars freeze remarkably well! Place sliced, chilled bars on a parchment-lined baking sheet to freeze solid for 1 hour. Wrap individually in plastic wrap and store in a freezer-safe container for up to 3 months. Thaw overnight in the refrigerator. Make-Ahead Tips: You can bake the blondie base up to 2 days in advance, wrap tightly in foil at room temperature, and frost the
Creamy Marry Me Chicken: Easy 25-Minute Skillet Dinner
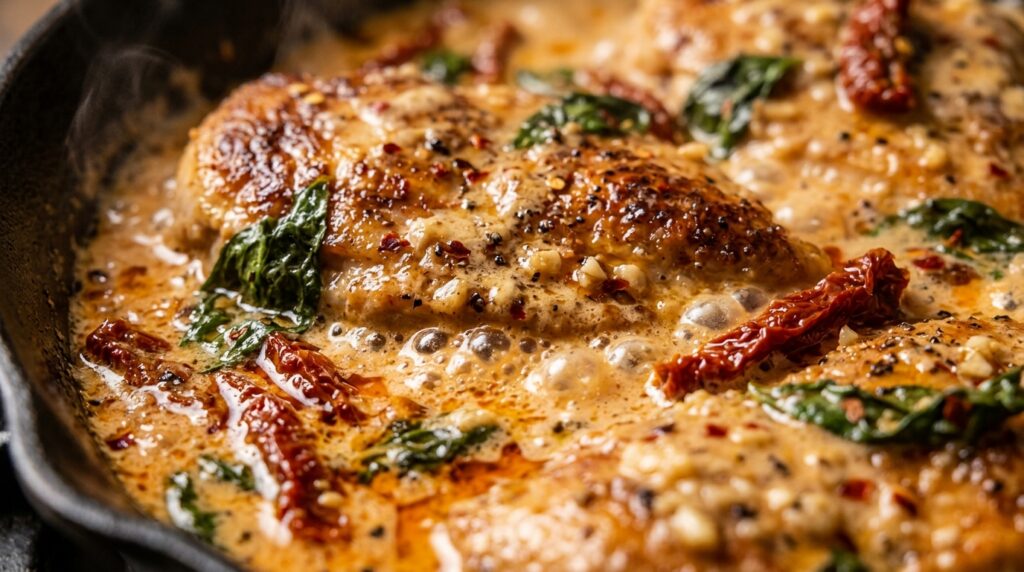
If there is one weeknight dinner that lives up to its viral legend, it is this unforgettable Creamy Marry Me Chicken. Featuring golden pan-seared chicken cutlets simmered in a luscious, velvety garlic parmesan cream sauce loaded with tangy sun-dried tomatoes, sweet fresh basil, and a subtle pinch of red chili warmth, this restaurant-grade one-skillet marvel comes together in just 25 minutes. Renowned for being so utterly delicious that it could inspire a marriage proposal, this quick skillet dinner delivers extraordinary depth and pure comfort with effortless cleanup! The secret behind the magic of Marry Me Chicken lies in the delicate balance of acidity, umami, and rich dairy. Lightly dredging the thinly sliced cutlets in seasoned flour creates a golden exterior that locks in tender moisture while creating caramelized skillet fond. Deglazing the pan with rich chicken broth releases those concentrated pan drippings directly into the sauce. Combined with oil-packed sun-dried tomatoes that offer bright tart sweetness and freshly grated Parmigiano-Reggiano that melts into silky emulsion, every spoonful coats the chicken with restaurant-quality decadence. Why You’ll Love This Recipe 25-Minute Rapid Timeline: Thin cutlets cook rapidly in under 10 minutes, making this an ultra-fast dinner solution for busy evenings. Single Skillet Simplicity: The entire dish—from searing the chicken to simmering the rich cream sauce—happens in one pan, keeping kitchen cleanup minimal. Irresistible Flavor Profile: Nutty parmesan, zesty garlic, sweet sun-dried tomatoes, and aromatic basil create a dynamic flavor harmony that pleases every palate. Versatile Serving Canvas: Pairs divine over al dente pasta, creamy mashed potatoes, buttered rice, or alongside warm crusty artisan bread. Key Ingredients & Smart Swaps Fresh chicken cutlets, sun-dried tomatoes, heavy cream, parmesan, and fresh herbs arranged on a quartz workstation. Chicken Cutlets: Boneless, skinless chicken breasts sliced horizontally into thin cutlets (or pounded to 1/2-inch thickness). Thin cutlets cook evenly in minutes without drying out. Sun-Dried Tomatoes: Use oil-packed sun-dried tomatoes rather than dry-packed ones. The oil carries immense flavor; use 1 tablespoon of it to sauté the garlic for even richer aroma! Heavy Whipping Cream: Real heavy cream provides the luscious body and stability needed so the sauce will not separate when simmering with acidic tomatoes. Fresh Parmigiano-Reggiano: Freshly grated parmesan melts into a velvety, lump-free sauce. Avoid cellulose-coated pre-shredded cheeses for best results. Fresh Basil: Stirred in at the very end, fresh sweet basil lends an essential herbaceous brightness that cuts through the creaminess. Step-by-Step Cooking Walkthrough 1. Prep & Dredge Cutlets: Slice chicken breasts in half horizontally to create thin cutlets. Whisk flour, garlic powder, salt, and pepper in a shallow bowl. Lightly dredge each cutlet, shaking off any excess flour. 2. Golden Pan-Sear: Heat olive oil and butter in a large skillet over medium-high heat. Sear chicken cutlets undisturbed for 4 to 5 minutes per side until crisp and golden brown. Transfer to a clean plate. Swirling rich heavy cream, savory broth, and sun-dried tomatoes into savory pan drippings on active heat. 3. Build the Cream Sauce: Sauté minced garlic, sun-dried tomatoes, oregano, and chili flakes in pan drippings for 60 seconds. Pour in chicken broth to deglaze the browned bits. Whisk in heavy cream and let simmer gently for 3 minutes until slightly reduced, then stir in grated parmesan until velvety smooth. 4. Assemble & Finish: Return the seared cutlets and resting juices to the skillet, spooning the luxurious cream sauce over each cutlet. Simmer on low heat for 2 minutes. Scatter fresh basil leaves over top and serve immediately! 3 Chef Secrets for Perfect Results 1. Slice Cutlets Thinly & Evenly: Thick chicken breasts take too long to cook through on the stovetop, causing the exterior coating to over-brown while the center remains raw. Slicing breasts into thin cutlets ensures a rapid 4-minute sear on each side that preserves succulent tenderness. 2. Harness the Sun-Dried Tomato Jar Oil: Instead of using standard cooking oil to sauté your garlic, scoop 1 tablespoon of the seasoned olive oil straight from the sun-dried tomato jar. It is infused with concentrated herbs and tomato essence that instantly elevates the skillet base. 3. Turn Off Heat Before Melting Parmesan: High direct heat can cause aged cheeses like Parmigiano-Reggiano to separate or become stringy. Lower the heat or pull the pan slightly off the burner before stirring in the grated parmesan for a silky, mirror-smooth emulsion. What to Serve With Marry Me Chicken Plated restaurant-style over tender angel hair pasta with fresh basil, cracked pepper, and crusty bread. Tender Al Dente Starches: Serve over buttery angel hair pasta, fettuccine, garlic butter egg noodles, or creamy Yukon Gold mashed potatoes to capture every drop of cream sauce. Warm Artisan Breads: Warm crusty sourdough, roasted garlic ciabatta, or buttery focaccia for dunking into the sun-dried tomato cream sauce. Crisp Green Sides: Roasted asparagus spears, garlic-tossed broccolini, or a light Italian arugula salad dressed with lemon vinaigrette. Wine Pairings: A crisp, dry white wine with bright acidity such as Sauvignon Blanc, Pinot Grigio, or an un-oaked Chardonnay balances the rich parmesan cream beautifully. Storage, Freezing & Reheating Instructions Refrigeration: Cool leftover chicken completely. Transfer chicken and sauce into an airtight glass container and refrigerate for up to 4 days. Gentle Stovetop Reheating: Reheat chicken in a skillet over low heat with a splash of chicken broth or heavy cream to restore the sauce’s silky consistency without separating. Microwave Method: Heat single portions in 45-second intervals at 50% power, stirring sauce between bursts to ensure gentle, even heating. Freezing: Because heavy dairy cream can separate upon thawing, freezing is generally not recommended for the best texture. If necessary, freeze in an airtight container for up to 2 months and thaw overnight in the refrigerator before gently reheating on the stove. Frequently Asked Questions Why is it called Marry Me Chicken?The recipe became a viral sensation because the dish is so intensely flavorful, comforting, and impressive that legend says anyone you make it for will immediately want to propose! Can I use chicken thighs instead of breasts?Yes! Boneless, skinless chicken thighs
Soft and Chewy Brown Butter Snickerdoodles: Bakery-Style Cookies
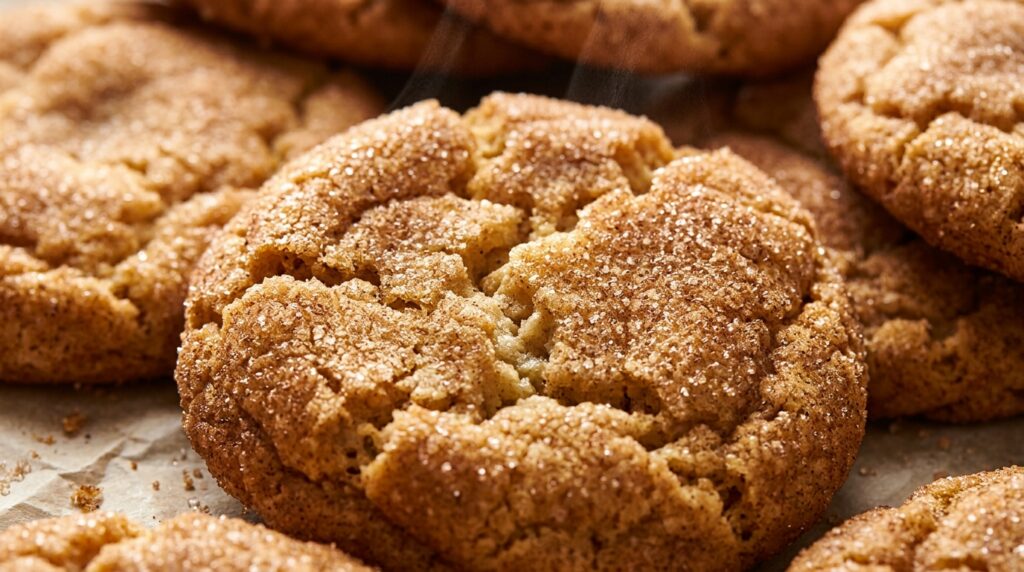
When the craving for a nostalgic holiday bakery treat strikes, nothing compares to these Soft and Chewy Brown Butter Snickerdoodles. Infused with rich, nutty toasted brown butter and aromatic pure vanilla, these bakery-style cookies boast ultra-soft, pillowy centers with chewy, crinkled edges rolled in a thick blanket of sparkling cinnamon sugar. Incredibly fragrant, perfectly spiced, and meltingly tender, they elevate the classic childhood favorite into an irresistible autumn masterpiece! The culinary secret to elevating humble snickerdoodles into extraordinary bakery-grade cookies comes down to two essential elements: brown butter and cream of tartar. Browning unsalted butter caramelizes its natural milk solids into golden, toasty flecks with a deep hazelnut and toffee profile. Cream of tartar acts as an acidic leavening stabilizer, preventing sugar crystallization to produce the signature tender, chewy texture and unmistakable subtle tang that sets authentic snickerdoodles apart from ordinary sugar cookies. Why You’ll Love This Recipe Toasty Brown Butter Flavor: Nutty, caramelized butter adds gourmet depth that elevates standard cinnamon cookies to bakery standards. Melt-in-Your-Mouth Soft Centers: Formulated with an extra egg yolk and brown sugar to lock in moisture for days of chewy softness. Signature Crinkle Tops: Generously rolled in Saigon cinnamon and granulated sugar for a delicate, sweet, crunchy crust. No Mixer Required: Can be whipped up quickly by hand in one bowl with just a whisk and spatula. Key Ingredients & Smart Swaps Browned butter, flour, cream of tartar, vanilla, and cinnamon sugar arranged on a clean workstation. Unsalted Butter: Browned in a skillet until amber and fragrant. Replacing 1 tablespoon of milk restores the moisture lost during the browning process. Cream of Tartar: The hallmark snickerdoodle ingredient! It provides the iconic subtle tang and gives the cookies their signature chewy, pillowy texture. Light Brown Sugar & White Sugar: A higher ratio of brown sugar adds caramel undertones and retains moisture for ultra-soft centers. Egg + Extra Egg Yolk: The extra yolk adds rich emulsifying fats that make the crumb velvety and prevent the cookies from drying out. Saigon Cinnamon: Highly recommended for rolling because it has higher essential oil content, yielding bold aroma and rich warmth. Step-by-Step Cooking Walkthrough 1. Brown the Butter: Melt butter in a light-colored pan over medium heat. Swirl until it foams, crackles, and releases toasty amber flecks. Pour immediately into a bowl and cool for 25 minutes. 2. Whisk Dry Ingredients: Combine all-purpose flour, cream of tartar, baking soda, and fine sea salt in a bowl. Rolling chilled cookie dough balls in fragrant cinnamon sugar crystals before baking. 3. Mix Wet Ingredients: Whisk cooled brown butter, brown sugar, and white sugar for 2 minutes. Whisk in the egg, extra egg yolk, vanilla, and milk until smooth and glossy. 4. Fold & Chill: Gently fold dry ingredients into wet until just combined. Chill dough in the refrigerator for 30 minutes so the dough holds its shape. 5. Roll & Bake: Scoop 2-tablespoon dough balls and roll generously in cinnamon sugar. Bake at 350°F (175°C) for 9 to 11 minutes until edges are set but centers remain soft. Cool on sheet for 10 minutes. 3 Chef Secrets for Perfect Results 1. The “Pan Bang” Trick for Crinkles: Right when you pull the baking sheet from the oven, give it a firm tap on the counter 2 or 3 times. This immediately collapses the puffed centers, creating stunning bakery-style ripples and locking in chewiness. 2. Never Skip the 30-Minute Chill: Chilling allows the flour to hydrate and the melted brown butter fats to solidify slightly. Skipping the chill causes the cookies to spread too thin and lose their pillowy centers. 3. Underbake Slightly for Ultimate Chew: Snickerdoodles should look puffy and slightly pale in the very center when you take them out of the oven. Residual pan heat finishes cooking them gently without drying them out. What to Serve With Brown Butter Snickerdoodles Served bakery-style on an artisan plate with cold milk and hot spiced coffee. Classic Pairings: A tall glass of ice-cold whole milk, oat milk, or almond milk. Warm Cozy Beverages: Freshly brewed dark roast espresso, cinnamon dolce latte, spiced chai tea, or hot spiced apple cider. Dessert Upgrades: Sandwich two snickerdoodles around a scoop of salted caramel or vanilla bean ice cream for an epic homemade ice cream sandwich! Storage, Freezing & Reheating Instructions Room Temperature Storage: Store baked snickerdoodles in an airtight container with a slice of plain sandwich bread for up to 5 days. The cookies absorb moisture from the bread, keeping them soft and fresh! Freezing Baked Cookies: Allow cookies to cool completely. Freeze in a single layer on a parchment-lined baking sheet for 1 hour, then transfer to a freezer-safe bag for up to 3 months. Thaw at room temperature for 15 minutes. Freezing Cookie Dough: Scoop and roll dough balls in cinnamon sugar, place on a baking sheet, and freeze solid. Store in a freezer bag for up to 3 months. Bake straight from frozen at 350°F, adding just 1 to 2 extra minutes! Frequently Asked Questions Can I make snickerdoodles without cream of tartar?Cream of tartar is essential for authentic snickerdoodles. In an emergency, substitute 2 teaspoons of cream of tartar and 1 teaspoon of baking soda with 2 teaspoons of baking powder, but note the cookies will taste more like cinnamon sugar cookies without the classic tangy chew. Why do my snickerdoodles turn out hard or crunchy?Overbaking is the main culprit. Cookies should look underbaked in the center when pulled at 9 to 11 minutes. Also ensure you measure flour by spooning it into the measuring cup rather than scooping directly from the bag. Can I make the dough in advance?Yes! The cookie dough can be kept covered in the refrigerator for up to 3 days. Roll in cinnamon sugar just before baking. Pin This Recipe for Later Love this cozy holiday cookie recipe? Save this pin to your Pinterest baking board so you have it ready for Thanksgiving, Christmas cookie swaps, and cozy weekend baking!
Creamy Cajun Chicken and Sausage Pasta: Easy 30-Min Dinner
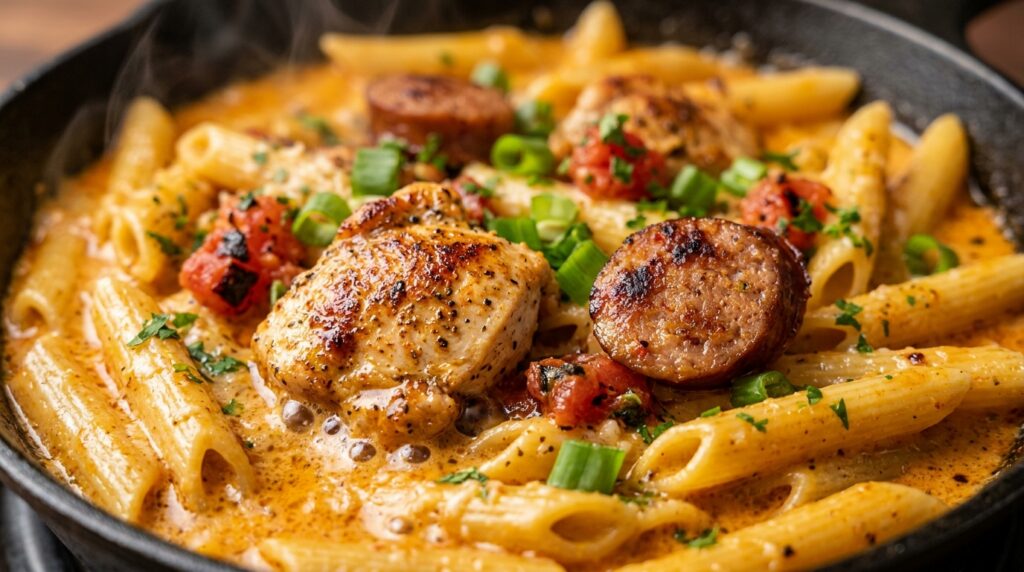
When weeknight dinner demands bold Southern comfort in under half an hour, nothing satisfies quite like this Creamy Cajun Chicken and Sausage Pasta. Loaded with juicy, golden-seared chicken breast bites, smoky sliced andouille sausage, and al dente penne smothered in a velvety garlic parmesan cream sauce infused with Louisiana Cajun spices and fire-roasted tomatoes, this restaurant-quality one-skillet meal delivers huge flavor with effortless cleanup. Spicy, creamy, and deeply satisfying, it’s a foolproof family favorite that earns rave reviews every single time! The culinary secret to an unforgettable Cajun pasta lies in layering fond—the deeply caramelized browned bits that form in the skillet while searing the meats. Searing the seasoned chicken breast and smoky andouille first renders savory seasoned oils that infuse the diced onions, bell peppers, and fresh garlic with authentic Louisiana depth. Deglazing the pan with rich chicken broth and fire-roasted tomatoes before swirling in heavy whipping cream and aged Parmigiano-Reggiano locks the spices into an emulsified, silky sauce that clings tenaciously to every ridge of the penne pasta. Why You’ll Love This Recipe Ready in Just 30 Minutes: A complete, hearty weeknight dinner built in one skillet from start to finish. Double-Meat Protein Power: Combines lean, tender chicken breast cubes with robust, smoky andouille sausage for incredible texture. Velvety Restaurant-Style Sauce: Made from real heavy cream, savory broth, fire-roasted tomatoes, and freshly grated parmesan—never canned soup or jarred sauces. Customizable Heat Level: Easily dialed up with extra cayenne pepper or toned down with a mild Cajun spice blend to suit the whole family. Key Ingredients & Smart Swaps Fresh chicken breast, andouille sausage, penne, cream, and Cajun spices arranged on a clean workstation. Chicken Breast: Boneless, skinless chicken breasts cut into uniform 1-inch bite-sized cubes for even, fast searing. Boneless skinless chicken thighs also work wonderfully. Smoked Andouille Sausage: Authentic Louisiana smoked andouille provides signature garlicky smoke and mild heat. Kielbasa or smoked turkey sausage can be substituted for a milder profile. Penne Rigate Pasta: Ridged penne captures the luscious cream sauce inside and out. Rigatoni, cavatappi, or fettuccine make delicious alternatives. Cajun Seasoning Blend: Use a high-quality salt-free or low-sodium Cajun or Creole blend (like Tony Chachere’s or Slap Ya Mama) so you can control salinity precisely. Heavy Whipping Cream & Parmesan: Heavy cream ensures the sauce simmers smoothly without curdling when combined with acidic tomatoes. Freshly grated Parmigiano-Reggiano melts into a velvety glaze. Fire-Roasted Diced Tomatoes: Adds subtle smoky sweetness and acidity that balances the richness of the cream sauce. Step-by-Step Cooking Walkthrough 1. Boil the Pasta: Cook penne in heavily salted boiling water until firm al dente. Reserve 1/2 cup pasta water, drain, and set aside. 2. Sear the Meats: Heat olive oil in a large skillet over medium-high heat. Sear Cajun-seasoned chicken cubes until golden and cooked through (5-6 min); transfer to a plate. In the same skillet, brown sliced andouille sausage rounds until crisp on the edges (4 min); transfer to plate. Tossing al dente penne and seared meats into the bubbling Cajun garlic parmesan sauce on active heat. 3. Build Aromatic Sauce Base: Melt butter in the skillet drippings. Sauté diced onions and bell peppers for 4 minutes, then stir in minced garlic and Cajun seasoning for 1 minute until fragrant. 4. Simmer the Cream Sauce: Add fire-roasted tomatoes, chicken broth, and heavy cream. Simmer gently for 4 to 5 minutes until thickened, then melt in the grated parmesan cheese until silky smooth. 5. Toss & Garnish: Return chicken, sausage, and penne to the skillet. Toss for 2 minutes until everything is piping hot and coated in sauce. Garnish with sliced green onions and fresh parsley. 3 Chef Secrets for Perfect Results 1. Cook Pasta 1 to 2 Minutes Under Package Time: Boil your pasta strictly al dente! Finishing the pasta directly in the bubbling Cajun cream sauce allows the noodles to absorb the flavorful sauce without turning mushy. 2. Grate Your Own Parmesan Cheese: Pre-shredded bagged parmesan is coated in cellulose anti-caking starches that cause sauces to turn grainy. Grating a fresh block of Parmigiano-Reggiano ensures a silky, glossy restaurant-grade emulsion. 3. Save Starchy Pasta Water: Always ladle out 1/2 cup of starchy pasta water before draining. If your cream sauce reduces too quickly or thickens too much upon standing, a quick splash of pasta water instantly restores velvety perfection. What to Serve With Creamy Cajun Pasta Served restaurant-style in an artisan bowl with toasted garlic bread and chilled wine. Artisan Breads: Warm crusty garlic French baguette, honey butter cornbread, or fluffy brioche dinner rolls for soaking up extra Cajun sauce. Crisp Fresh Salads: A refreshing garden greens salad with buttermilk ranch, a crisp Caesar salad, or a crunchy cucumber tomato salad. Beverage Pairings: A crisp, chilled Sauvignon Blanc, Pinot Grigio, dry Riesling, an amber Louisiana lager, or iced sweet tea. Storage, Freezing & Reheating Instructions Refrigeration: Allow leftover pasta to cool completely. Store in an airtight glass container in the refrigerator for up to 4 days. Gentle Reheating: Reheat in a skillet over medium-low heat with a splash of milk, chicken broth, or heavy cream to loosen the sauce and revive its velvety texture. Microwave individual portions at 50% power in 45-second intervals. Freezing: Because dairy cream sauces can separate upon freezing, this recipe is best enjoyed fresh. However, leftovers can be frozen in an airtight freezer-safe container for up to 2 months. Thaw overnight in the fridge and reheat gently on the stovetop with a splash of cream. Frequently Asked Questions Is this Cajun chicken pasta very spicy?It has a gentle, flavorful warmth from the Cajun seasoning and andouille sausage. To make it milder, use smoked kielbasa and a mild Cajun seasoning. For extra heat, add 1/4 teaspoon cayenne pepper or diced jalapeños! Can I use half-and-half or milk instead of heavy cream?Heavy cream gives the richest, thickest sauce and will not curdle with acidic tomatoes. If using half-and-half, whisk 1 tablespoon of all-purpose flour or cornstarch into the broth first to prevent separation and help thicken. Can
Warm Gooey Cinnamon Roll Apple Cobbler: Easy Fall Baking
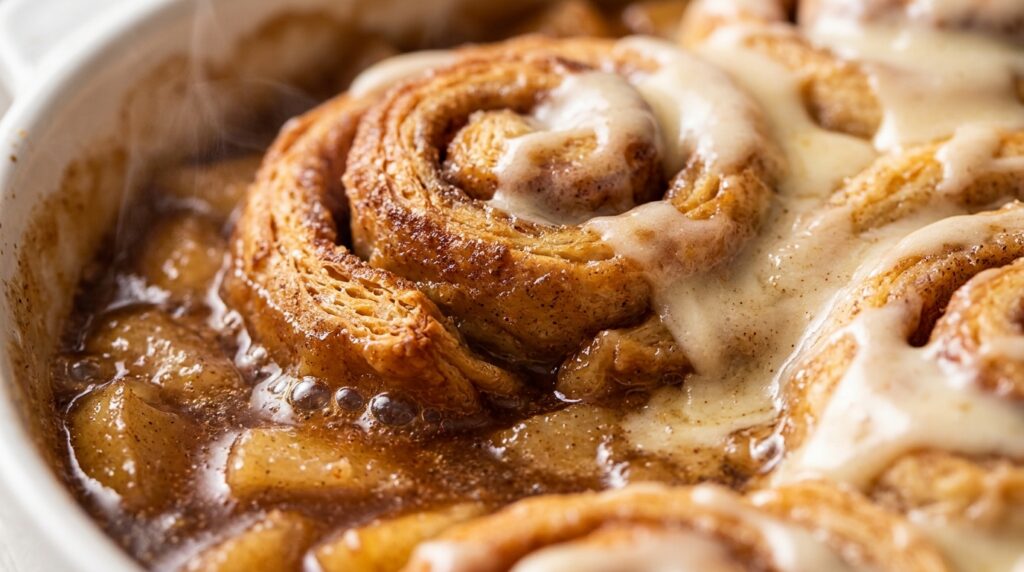
When the autumn breeze rolls in and your home calls for the warm comfort of fresh baking, nothing satisfies quite like this Warm Gooey Cinnamon Roll Apple Cobbler. Combining tender, spiced caramelized Honeycrisp apples with fluffy, golden cinnamon roll swirls and a generous drizzle of silky cream cheese icing, this effortless dessert delivers all the nostalgia of grandma’s homemade apple pie with less than 10 minutes of hands-on prep. Bubbling, fragrant, and decadent, it’s the ultimate cozy fall treat that disappears in minutes at every gathering! The culinary brilliance of this recipe lies in the contrast of textures. Traditional fruit cobblers rely on biscuit drop dough or oat streusel, but substituting cut-up refrigerated jumbo cinnamon rolls creates pockets of soft, pillowy dough that soak up spiced brown sugar apple juices from underneath while baking to a crisp, buttery golden finish on top. The natural apple pectin and butter thicken into a luscious caramel sauce, while a splash of fresh lemon juice cuts through the sweetness to ensure perfect, balanced decadence in every single bite. Why You’ll Love This Recipe 10-Minute Hands-On Prep: No rolling pie crust or kneading dough—simply chop, layer, and bake for instant bakery-quality comfort. Warm Caramelized Fall Flavors: Packed with Honeycrisp apples, dark brown sugar, Saigon cinnamon, and warm nutmeg for irresistible seasonal aroma. The Best of Both Desserts: Marries the gooey, spiced layers of warm bakery cinnamon rolls with the tart, juicy decadence of traditional apple cobbler. Crowd-Pleasing Showstopper: Perfect for Thanksgiving dessert spreads, holiday brunches, potlucks, and cozy family Sunday dinners. Key Ingredients & Smart Swaps Fresh Honeycrisp apples, cinnamon rolls, brown sugar, and spices arranged on a clean quartz workstation. Refrigerated Jumbo Cinnamon Rolls: Use Grands or jumbo-style cinnamon rolls with cream cheese icing included in the can. Cut each roll into 6 bite-sized pieces so they bake evenly throughout without staying doughy. Apples / Apple Pie Filling: Two cans of premium apple pie filling make this ultra-fast. For homemade filling, peel and slice 5 large Honeycrisp or Granny Smith apples and toss with 2 tablespoons cornstarch, 1/3 cup brown sugar, and cinnamon. Dark Brown Sugar & Warm Spices: Enhances the fruit base with deep molasses notes, fragrant cinnamon, nutmeg, and a pinch of ground cloves for authentic harvest depth. Pure Vanilla Extract & Lemon Juice: Real bourbon vanilla rounds out the bakery aromatics, while a tablespoon of fresh lemon juice brightens the fruit and balances the sweetness. Cream Cheese Icing: Drizzled over the cobbler while still warm so it gently melts into every swirl crevice. Step-by-Step Cooking Walkthrough 1. Prep the Baking Dish: Preheat oven to 375°F (190°C) and grease a standard 9×13-inch ceramic or glass baking dish with unsalted butter. 2. Mix Spiced Apple Layer: In a mixing bowl, toss the sliced apples with brown sugar, ground cinnamon, nutmeg, vanilla, and fresh lemon juice until richly coated. Spread the mixture in an even layer across the bottom of the dish. Arranging bite-sized cinnamon roll dough rounds over the spiced apple caramel base before baking. 3. Cut & Scatter Dough: Open the cinnamon rolls and set aside the icing. Cut each roll into 6 bite-sized wedges and scatter them evenly over the apple layer, ensuring even spacing so heat circulates freely. 4. Butter & Cinnamon Sugar Top: Brush melted butter over the dough tops and sprinkle with cinnamon sugar for an extra crunchy, caramelized crust. 5. Bake & Glaze: Bake uncovered for 35 to 40 minutes until puffed and golden brown. Let rest for 10 minutes, drizzle warm cream cheese icing all over, and serve piping hot. 3 Chef Secrets for Perfect Results 1. Cut Rolls into Small Bite-Sized Pieces: Never place whole cinnamon rolls over the apples! Cutting them into 6 pieces per roll increases surface area, allowing heat to penetrate fully and cook the centers through without leaving raw dough. 2. Tent with Foil If Browning Too Fast: Because cinnamon roll dough contains sugar, the tops can brown quickly. Check at the 25-minute mark; if deep golden, loosely tent a sheet of aluminum foil over the baking dish for the final 10 to 15 minutes. 3. Glaze in Two Stages: Drizzle half the cream cheese icing when the cobbler is fresh out of the oven so it melts into the warm crevices, then drizzle the remaining icing right before serving for a stunning bakery look. What to Serve With Cinnamon Roll Apple Cobbler Served warm in an artisan ceramic bowl with a melting scoop of vanilla bean ice cream and salted caramel. Ice Cream & Creams: A generous scoop of slow-churned French vanilla bean ice cream, cinnamon gelato, or freshly whipped bourbon cream. Sauce Pairings: Warm salted caramel sauce, spiced apple cider reduction, or a dusting of toasted chopped pecans. Warm Beverages: Freshly brewed dark roast coffee, spiced hot apple cider, pumpkin spice lattes, or hot chai tea. Storage, Freezing & Reheating Instructions Refrigeration: Allow leftover cobbler to cool completely. Cover the baking dish tightly with foil or transfer leftovers to an airtight container and store in the refrigerator for up to 4 days. Gentle Reheating: Warm individual portions in the microwave for 30 to 45 seconds, or reheat the covered baking dish in a 325°F (165°C) oven for 12 to 15 minutes to revive the crisp, flaky cinnamon roll topping. Freezing: Bake the cobbler without icing and allow to cool completely. Wrap tightly with plastic wrap and aluminum foil, then freeze for up to 2 months. Thaw in the fridge overnight and reheat in a 350°F oven until warmed through before icing. Frequently Asked Questions Can I use fresh apples instead of canned apple pie filling?Yes! Peel, core, and slice 5 medium Honeycrisp or Granny Smith apples thinly. Toss them in a bowl with 1/3 cup brown sugar, 2 tablespoons cornstarch, 1.5 teaspoons cinnamon, 1 tablespoon melted butter, and 1 tablespoon lemon juice before layering into the baking dish. How do I make sure the cinnamon roll dough doesn’t stay raw?The key is cutting each cinnamon roll into 6